Pages

Monday, December 30, 2013

PTU - Bright New Year

This tutorial was written by me on December 30, 2013. Please do not claim as your own. Any resemblance to any other tutorial is purely coincidental.
------------------------------------------------
Mask Of Choice 

Scrap Kit - PTU scrap kit called Bright New Year By Gimptastic Scraps
You can purchase the kit here

Font Of Choice 

Tube Of Choice - Artwork by Ismael Rac. You must obtain a license from his store to use this tube.

Program - Gimp 2.6..but any program will do.

--------------------------------------------

Open New Canvas
I did 650x650.you can resize it at the end if you would like.

Ready...
Set...
Go...

Open Background
Now open Frame4
Now open Paper3  . You use ellipse tool and make a circle on paper3
Copy/Paste Frame4

Open These Elements and use the same dropshadow as above and resize to your liking!!!

Boombox
Bottle
Bubbles
DiscoBall
Lightbulb
Ornaments
Scatter
Stars
Tapes

Now dropshadow your elements with these settings.

Filters, Light And Shadows...DropShadow
Offset X - 9
Offset Y - 9
Blur Radius - 15
Opacity - 74
Color - #000000
Allow Resizing

Now resize your tag to 600x600 if you would like. 

When you are happy with your tag..
Add Copyright!!
Add Name!!
Merge All Layers!
Save!
Enjoy!!

Hope you enjoyed my tutorial. 
Thursday, December 26, 2013

PTU - Cheers 2014

This tutorial was written by me on December 26, 2013. Please do not claim as your own. Any resemblance to any other tutorial is purely coincidental.
------------------------------------------------
Mask Of Choice 

Scrap Kit - PTU scrap kit called Cheers By Tasha's Playground
You can purchase the kit here

Font Of Choice 

Tube Of Choice - Artwork by Elias Chatzoudis. You must obtain a license from his store to use this tube.

Program - Gimp 2.6..but any program will do.

--------------------------------------------

Open New Canvas
I did 650x650.you can resize it at the end if you would like.

Open Mask
Right click on your layers 
Go down to alpha by selection
Edit > fill w/ BG color - Make sure color is #FFFFFF

Open Paper 4
Right click on your layers
Click add layer mask
Then a window will pop up 
then click black (full transparency)
Then click add
Edit > Copy 
Edit > Paste
On Layers > click on floating selection
Then right click on layers
scroll down to anchor layer
Delete first layer!!!

You should have a mask..then a black square next to it on your layers.
Image > Merge Visible Layers 
Box should pop up..click clipped to image > Merge

-----------------------------------------------------------------

Ready...
Set...
Go...

Open Frame2
Now open Paper4  . You use ellipse tool and make a circle on paper4
Copy/Paste inside Frame2

Open These Elements and use the same dropshadow as above and resize to your liking!!!

Balloons (duplicate 1x and flip)
Bauble
Bell
Bird
Car
Champagne Bottle
Cityline
Clock1
Clock3
Cocktail
Confetti
Disco Ball
Gift
Hat1
Party Cracker
Party Hat
Saxophone
Sparkles1
Sparkles2

Now dropshadow your elements with these settings.

Filters, Light And Shadows...DropShadow
Offset X - 9
Offset Y - 9
Blur Radius - 15
Opacity - 74
Color - #000000
Allow Resizing

Now resize your tag to 600x600 if you would like. 

When you are happy with your tag..
Add Copyright!!
Add Name!!
Merge All Layers!
Save!
Enjoy!!

Hope you enjoyed my tutorial. 

Wednesday, December 25, 2013

Creative Chicks Showoff

I am a mod/manager of the forum called Creative Chicks. One of my templates was chosen to be apart of the template challenge for this week. Some of the managers made me some beautiful tags out of my template. Thank you ladies for making these for me. 

Rosesblack:


Aurelie


Erica


Bev


Karen

Sunday, December 22, 2013

PTU - New Years Delight

This tutorial was written by me on November 21, 2013. Please do not claim as your own. Any resemblance to any other tutorial is purely coincidental.
------------------------------------------------
Mask Of Choice 

Scrap Kit - PTU scrap kit called New Years Delight By Kissing Kate
You can purchase the kit here

Font Of Choice 

Tube Of Choice - Artwork by Keith Garvey. You must obtain a license from his store to use this tube.

Program - Gimp 2.6..but any program will do.

--------------------------------------------

Open New Canvas
I did 650x650.you can resize it at the end if you would like.

Open Mask
Right click on your layers 
Go down to alpha by selection
Edit > fill w/ BG color - Make sure color is #FFFFFF

Open Paper 3
Right click on your layers
Click add layer mask
Then a window will pop up 
then click black (full transparency)
Then click add
Edit > Copy 
Edit > Paste
On Layers > click on floating selection
Then right click on layers
scroll down to anchor layer
Delete first layer!!!

You should have a mask..then a black square next to it on your layers.
Image > Merge Visible Layers 
Box should pop up..click clipped to image > Merge

-----------------------------------------------------------------

Ready...
Set...
Go...

Open Frame3
Now open Paper4  . You use rectangle tool and make a square on paper4
Copy/Paste Frame3

Open These Elements and use the same dropshadow as above and resize to your liking!!!

Element10
Element15
Element22
Element25
Element39
Element48
Element5
Element59
Element9 (duplicate 1x and flip)

Now dropshadow your elements with these settings.

Filters, Light And Shadows...DropShadow
Offset X - 9
Offset Y - 9
Blur Radius - 15
Opacity - 74
Color - #000000
Allow Resizing

Now resize your tag to 600x600 if you would like. 

When you are happy with your tag..
Add Copyright!!
Add Name!!
Merge All Layers!
Save!
Enjoy!!

Hope you enjoyed my tutorial. 

PTU - Iced Fantasy

This tutorial was written by me on December 22, 2013. Please do not claim as your own. Any resemblance to any other tutorial is purely coincidental.
------------------------------------------------
Mask Of Choice 

Scrap Kit - PTU scrap kit called Iced Fantasy By Tasha's Playground!!!
You can purchase the kit here

Font Of Choice 

Tube Of Choice - Artwork by Jessica Dougherty. You must obtain a license from CDO to use this tube.

Program - Gimp 2.6..but any program will do.

--------------------------------------------

Open New Canvas
I did 650x650.you can resize it at the end if you would like.

Open Mask
Right click on your layers 
Go down to alpha by selection
Edit > fill w/ BG color - Make sure color is #FFFFFF

Open Paper 1
Right click on your layers
Click add layer mask
Then a window will pop up 
then click black (full transparency)
Then click add
Edit > Copy 
Edit > Paste
On Layers > click on floating selection
Then right click on layers
scroll down to anchor layer
Delete first layer!!!

You should have a mask..then a black square next to it on your layers.
Image > Merge Visible Layers 
Box should pop up..click clipped to image > Merge

-----------------------------------------------------------------

Ready...
Set...
Go...

Open Frame3
Now open Paper5  . You use rectangle tool and make a square on paper5
Copy/Paste inside Frame3

Open These Elements and use the same dropshadow as above and resize to your liking!!!

Frame2
Fog
Holly
Icicles2
Lantern
Ornament4
Snowflakes1
Snowflake3
Snowmound2
Sparkles2


Now dropshadow your elements with these settings.

Filters, Light And Shadows...DropShadow
Offset X - 9
Offset Y - 9
Blur Radius - 15
Opacity - 80
Color - #000000
Allow Resizing

Now resize your tag to 600x600 if you would like. 

When you are happy with your tag..
Add Copyright!!
Add Name!!
Merge All Layers!
Save!
Enjoy!!

Hope you enjoyed my tutorial. 

Thursday, December 19, 2013

PTU - Christmas Blues


This tutorial was written by me on December 19th, 2013. Please do not claim as your own. Any resemblance to any other tutorial is purely coincidental.
------------------------------------------------
Mask Of Choice 

Scrap Kit - PTU scrap kit called Christmas Blues By Amy Marie!!!
You can purchase the kit here

Font Of Choice 

Tube Of Choice - Artwork by Jessica Dougherty. You must obtain a license from CDO to use this tube.

Program - Gimp 2.6..but any program will do.

--------------------------------------------

Open New Canvas
I did 650x650.you can resize it at the end if you would like.

Open Mask
Right click on your layers 
Go down to alpha by selection
Edit > fill w/ BG color - Make sure color is #FFFFFF

Open Paper 8
Right click on your layers
Click add layer mask
Then a window will pop up 
then click black (full transparency)
Then click add
Edit > Copy 
Edit > Paste
On Layers > click on floating selection
Then right click on layers
scroll down to anchor layer
Delete first layer!!!

You should have a mask..then a black square next to it on your layers.
Image > Merge Visible Layers 
Box should pop up..click clipped to image > Merge

-----------------------------------------------------------------

Ready...
Set...
Go...

Open 71
Now open Paper4  . You use ellipse tool and make a circle on paper4
Copy/Paste inside 71

Open These Elements and use the same dropshadow as above and resize to your liking!!!

45
54
62
64
86

Now dropshadow your elements with these settings.

Filters, Light And Shadows...DropShadow
Offset X - 9
Offset Y - 9
Blur Radius - 15
Opacity - 76
Color - #000000
Allow Resizing

Now resize your tag to 600x600 if you would like. 

When you are happy with your tag..
Add Copyright!!
Add Name!!
Merge All Layers!
Save!
Enjoy!!

Hope you enjoyed my tutorial. 

Monday, December 16, 2013

PTU - Christmas Dog


This tutorial was written by me on December 16, 2013. Please do not claim as your own. Any resemblance to any other tutorial is purely coincidental.
------------------------------------------------
Mask Of Choice 

Scrap Kit - PTU scrap kit called Christmas Spirit By Gemini Creationz
You can purchase the kit here

Font Of Choice 

Tube Of Choice - Artwork by Maryline Cazenave. You must obtain a license from CDO to use this tube.

Program - Gimp 2.6..but any program will do.

--------------------------------------------

Open New Canvas
I did 650x650.you can resize it at the end if you would like.

Open Mask
Right click on your layers 
Go down to alpha by selection
Edit > fill w/ BG color - Make sure color is #FFFFFF

Open Paper 5
Right click on your layers
Click add layer mask
Then a window will pop up 
then click black (full transparency)
Then click add
Edit > Copy 
Edit > Paste
On Layers > click on floating selection
Then right click on layers
scroll down to anchor layer
Delete first layer!!!

You should have a mask..then a black square next to it on your layers.
Image > Merge Visible Layers 
Box should pop up..click clipped to image > Merge

-----------------------------------------------------------------

Ready...
Set...
Go...

Open Frame5
Now open Paper8  . You use ellipse tool and make a circle on paper8
Copy/Paste inside Frame5

Open These Elements and use the same dropshadow as above and resize to your liking!!!

Angel
Bell
Deer
GiftBow
Ornament1
Pinecone
Tree1
Wreath

Now dropshadow your elements with these settings.

Filters, Light And Shadows...DropShadow
Offset X - 9
Offset Y - 9
Blur Radius - 15
Opacity - 80
Color - #000000
Allow Resizing

Now resize your tag to 600x600 if you would like. 

When you are happy with your tag..
Add Copyright!!
Add Name!!
Merge All Layers!
Save!
Enjoy!!

Hope you enjoyed my tutorial. 
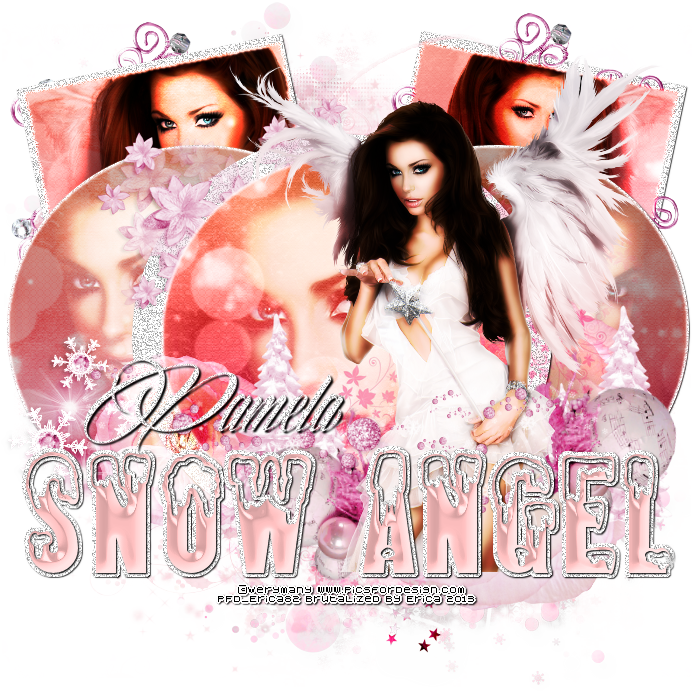
NEW KIT IN STORES - Black And White Winter


This kit contains 32 elements, 14 papers and 4 frames!!!
You can find this kit at any of my stores to the left of my blog.

Saturday, December 14, 2013

PTU - Happily Ever After

This tutorial was written by me on December 14, 2013. Please do not claim as your own. Any resemblance to any other tutorial is purely coincidental.
------------------------------------------------
Mask Of Choice 

Scrap Kit - PTU scrap kit called Happily Ever After By Kissing Kate
You can purchase the kit here

Font Of Choice 

Tube Of Choice - Artwork by Keith Garvey. You must obtain a license from his store to use this tube.

Program - Gimp 2.6..but any program will do.

--------------------------------------------

Open New Canvas
I did 650x650.you can resize it at the end if you would like.

Open Mask
Right click on your layers 
Go down to alpha by selection
Edit > fill w/ BG color - Make sure color is #FFFFFF

Open Paper 4
Right click on your layers
Click add layer mask
Then a window will pop up 
then click black (full transparency)
Then click add
Edit > Copy 
Edit > Paste
On Layers > click on floating selection
Then right click on layers
scroll down to anchor layer
Delete first layer!!!

You should have a mask..then a black square next to it on your layers.
Image > Merge Visible Layers 
Box should pop up..click clipped to image > Merge

-----------------------------------------------------------------

Ready...
Set...
Go...

Open Frame1
Now open Paper1  . You use ellipse tool and make a circle on paper1
Copy/Paste inside Frame1

Open These Elements and use the same dropshadow as above and resize to your liking!!!

Element12
Element13
Element14
Element18
Element20
Element26
Element28
Element38
Element39
Element47
Element48

Now dropshadow your elements with these settings.

Filters, Light And Shadows...DropShadow
Offset X - 9
Offset Y - 9
Blur Radius - 15
Opacity - 77
Color - #000000
Allow Resizing

Now resize your tag to 600x600 if you would like. 

When you are happy with your tag..
Add Copyright!!
Add Name!!
Merge All Layers!
Save!
Enjoy!!

Hope you enjoyed my tutorial. 

Thursday, December 12, 2013

PTU - Crimson Snow

This tutorial was written by me on December 12, 2013. Please do not claim as your own. Any resemblance to any other tutorial is purely coincidental.
------------------------------------------------
Mask Of Choice 

Scrap Kit - PTU scrap kit called Crimison Snow By Jackie's Jewels
You can purchase the kit here

Font Of Choice 

Tube Of Choice - Artwork by KiwiFireStorm. You must obtain a license from TPP to use this tube.

Program - Gimp 2.6..but any program will do.

--------------------------------------------

Open New Canvas
I did 650x650.you can resize it at the end if you would like.

Open Mask
Right click on your layers 
Go down to alpha by selection
Edit > fill w/ BG color - Make sure color is #FFFFFF

Open Paper 9
Right click on your layers
Click add layer mask
Then a window will pop up 
then click black (full transparency)
Then click add
Edit > Copy 
Edit > Paste
On Layers > click on floating selection
Then right click on layers
scroll down to anchor layer
Delete first layer!!!

You should have a mask..then a black square next to it on your layers.
Image > Merge Visible Layers 
Box should pop up..click clipped to image > Merge

-----------------------------------------------------------------

Ready...
Set...
Go...

Open Frame2 and Frame5
Now open Paper14  . You use ellipse tool and make a circle on paper14
Copy/Paste inside Frame2

Open These Elements and use the same dropshadow as above and resize to your liking!!!

Apple Deco
Boots
Coffee
Lantern
Leaf
Package
Pinecone
Snow1
Snowfall
Trees
Tree2
Wheel

Now dropshadow your elements with these settings.

Filters, Light And Shadows...DropShadow
Offset X - 9
Offset Y - 9
Blur Radius - 15
Opacity - 74
Color - #000000
Allow Resizing

Now resize your tag to 600x600 if you would like. 

When you are happy with your tag..
Add Copyright!!
Add Name!!
Merge All Layers!
Save!
Enjoy!!

Hope you enjoyed my tutorial. 
Wednesday, December 11, 2013

PTU - Brrr

This tutorial was written by me on December 11, 2013. Please do not claim as your own. Any resemblance to any other tutorial is purely coincidental.
------------------------------------------------
Mask Of Choice 

Scrap Kit - PTU scrap kit called Brrrr By Freeks Creations
You can purchase the kit here

Font Of Choice 

Tube Of Choice - Artwork by Pin Up Toons. You must obtain a license from CDO to use this tube.

Program - Gimp 2.6..but any program will do.

--------------------------------------------

Open New Canvas
I did 650x650.you can resize it at the end if you would like.

Open Mask
Right click on your layers 
Go down to alpha by selection
Edit > fill w/ BG color - Make sure color is #FFFFFF

Open Paper 8
Right click on your layers
Click add layer mask
Then a window will pop up 
then click black (full transparency)
Then click add
Edit > Copy 
Edit > Paste
On Layers > click on floating selection
Then right click on layers
scroll down to anchor layer
Delete first layer!!!

You should have a mask..then a black square next to it on your layers.
Image > Merge Visible Layers 
Box should pop up..click clipped to image > Merge

-----------------------------------------------------------------

Ready...
Set...
Go...

Open Frame
Now open Paper5  . You use rectangle tool and make a square on paper5
Copy/Paste inside Frame

Open These Elements and use the same dropshadow as above and resize to your liking!!!

Birdhouse
IceCicles
Nogg
Pinecone
Snow Dift
Snowlogs
Snowman
SnowSpash
Tree

Now dropshadow your elements with these settings.

Filters, Light And Shadows...DropShadow
Offset X - 9
Offset Y - 9
Blur Radius - 15
Opacity - 77
Color - #000000
Allow Resizing

Now resize your tag to 600x600 if you would like. 

When you are happy with your tag..
Add Copyright!!
Add Name!!
Merge All Layers!
Save!
Enjoy!!

Hope you enjoyed my tutorial. 

Tuesday, December 10, 2013

PTU - Majestic Christmas

This tutorial was written by me on December 10, 2013. Please do not claim as your own. Any resemblance to any other tutorial is purely coincidental.
------------------------------------------------
Mask Of Choice 

Scrap Kit - PTU scrap kit called Majestic Christmas By Jackie's Jewel's
You can purchase the kit here

Font Of Choice 

Tube Of Choice - Artwork by Elias Chatzoudis. You must obtain a license from his store to use this tube.

Program - Gimp 2.6..but any program will do.

--------------------------------------------

Open New Canvas
I did 650x650.you can resize it at the end if you would like.

Open Mask
Right click on your layers 
Go down to alpha by selection
Edit > fill w/ BG color - Make sure color is #FFFFFF

Open Paper 10
Right click on your layers
Click add layer mask
Then a window will pop up 
then click black (full transparency)
Then click add
Edit > Copy 
Edit > Paste
On Layers > click on floating selection
Then right click on layers
scroll down to anchor layer
Delete first layer!!!

You should have a mask..then a black square next to it on your layers.
Image > Merge Visible Layers 
Box should pop up..click clipped to image > Merge

-----------------------------------------------------------------

Ready...
Set...
Go...

Open 3
Now open Paper2  . You use ellipse tool and make a circle on paper2
Copy/Paste inside 3

Open These Elements and use the same dropshadow as above and resize to your liking!!!

14
15
20
21
25
27
30
33
39
41
69
72
76

Now dropshadow your elements with these settings.

Filters, Light And Shadows...DropShadow
Offset X - 9
Offset Y - 9
Blur Radius - 15
Opacity - 77
Color - #000000
Allow Resizing

Now resize your tag to 600x600 if you would like. 

When you are happy with your tag..
Add Copyright!!
Add Name!!
Merge All Layers!
Save!
Enjoy!!

Hope you enjoyed my tutorial. 

Sunday, December 8, 2013

Winter Frost Snags - Tasha's Playground

I used this beautiful kit by Tasha's playground. It contains 75 elements and 10 papers. You will not be disappointed in this kit. You can visit Tasha's blog to visit her stores. 


Tag:


Here are some snags for you to snag.
Please do not resize, altar or add your name to these.
Click on snag to get full size.


Saturday, December 7, 2013

PTU - Feelin Frosty


This tutorial was written by me on December 7th, 2013. Please do not claim as your own. Any resemblance to any other tutorial is purely coincidental.
------------------------------------------------
Mask Of Choice 

Scrap Kit - PTU scrap kit called Feelin Frosty By Jackie's Jewels
You can purchase the kit here

Font Of Choice 

Tube Of Choice - Artwork by Disco Science. You must obtain a license to use this tube from PFD.

Program - Gimp 2.6..but any program will do.

--------------------------------------------

Open New Canvas
I did 650x650.you can resize it at the end if you would like.

Open Mask
Right click on your layers 
Go down to alpha by selection
Edit > fill w/ BG color - Make sure color is #FFFFFF

Open Paper 2
Right click on your layers
Click add layer mask
Then a window will pop up 
then click black (full transparency)
Then click add
Edit > Copy 
Edit > Paste
On Layers > click on floating selection
Then right click on layers
scroll down to anchor layer
Delete first layer!!!

You should have a mask..then a black square next to it on your layers.
Image > Merge Visible Layers 
Box should pop up..click clipped to image > Merge

-----------------------------------------------------------------

Ready...
Set...
Go...

Open 5
Now open Paper13  . You use ellipse tool and make a circle on paper13
Copy/Paste inside 5

Open These Elements and use the same dropshadow as above and resize to your liking!!!

10
31
29
33
40
44
45
46
49
63
65
73
77

Now dropshadow your elements with these settings.

Filters, Light And Shadows...DropShadow
Offset X - 9
Offset Y - 9
Blur Radius - 15
Opacity - 77
Color - #000000
Allow Resizing

Now resize your tag to 600x600 if you would like. 

When you are happy with your tag..
Add Copyright!!
Add Name!!
Merge All Layers!
Save!
Enjoy!!

Hope you enjoyed my tutorial. 

Thursday, December 5, 2013

PTU - Silver & Gold


This tutorial was written by me on December 5, 2013. Please do not claim as your own. Any resemblance to any other tutorial is purely coincidental.
------------------------------------------------
Mask Of Choice 

Scrap Kit - PTU scrap kit called Silver N Gold By Amy Marie!!!
You can purchase the kit here

Font Of Choice 

Tube Of Choice - Artwork by Ismael Rac. You must obtain a license from his store to use this tube.


Program - Gimp 2.6..but any program will do.

--------------------------------------------

Open New Canvas
I did 650x650.you can resize it at the end if you would like.

Open Mask
Right click on your layers 
Go down to alpha by selection
Edit > fill w/ BG color - Make sure color is #FFFFFF

Open Paper 6
Right click on your layers
Click add layer mask
Then a window will pop up 
then click black (full transparency)
Then click add
Edit > Copy 
Edit > Paste
On Layers > click on floating selection
Then right click on layers
scroll down to anchor layer
Delete first layer!!!

You should have a mask..then a black square next to it on your layers.
Image > Merge Visible Layers 
Box should pop up..click clipped to image > Merge

-----------------------------------------------------------------

Ready...
Set...
Go...

Open 61
Now open Paper4  . You use ellipse tool and make a circle on paper4
Copy/Paste inside 61

Open These Elements and use the same dropshadow as above and resize to your liking!!!

100
102
108
109
110
112
127
128
51
57
58
69
85
98

Now dropshadow your elements with these settings.

Filters, Light And Shadows...DropShadow
Offset X - 9
Offset Y - 9
Blur Radius - 15
Opacity - 80
Color - #000000
Allow Resizing

Now resize your tag to 600x600 if you would like. 

When you are happy with your tag..
Add Copyright!!
Add Name!!
Merge All Layers!
Save!
Enjoy!!

Hope you enjoyed my tutorial.