Pages

Sunday, June 30, 2013

CT Tag For Abstract Creations - Glamour Extras

I used the scrap kit by Abstract Creations. You can find this kit exclusively at CDO. Click here to visit her part of the store. I have made a few extras for you all. Please comment if you snag.


Here are the extras for you  to snag. Please do not altar, resize or add names to these snags!!


Photobucket

CT Showoff

Amisha made this beautiful tag using my steampunk freakshow kit. You can purchase this kit at any of the stores I sell at on the left of my blog.

She also made some extras and a cluster frame as well. You can pick these up on her blog here


Photobucket

Thursday, June 27, 2013

PTU - Rockin Tea Party Dream

This tutorial was written by me on June 27th, 2013. Please do not claim as your own. Any resemblance to any other tutorial is purely coincidental.
------------------------------------------------
Mask Of Choice

Scrap Kit - PTU scrap kit called Tea Party Dream By Jackie's Jewels
You can purchase the kit at any of the stores she sells at on her blog.

Font Of Choice

Tube Of Choice - Artwork by Maryline Cazenave. You must obtain a license from CDO to use this tube.

Program - Gimp 2.6..but any program will do.

--------------------------------------------

Open New Canvas
I did 650x650.you can resize it at the end if you would like.

Open Mask
Right click on your layers
Go down to alpha by selection
Edit > fill w/ BG color - Make sure color is #FFFFFF

Open Paper 1
Right click on your layers
Click add layer mask
Then a window will pop up
then click black (full transparency)
Then click add
Edit > Copy
Edit > Paste
On Layers > click on floating selection
Then right click on layers
scroll down to anchor layer
Delete first layer!!!

You should have a mask..then a black square next to it on your layers.
Image > Merge Visible Layers
Box should pop up..click clipped to image > Merge

-----------------------------------------------------------------

Ready...
Set...
Go...

Open Frame1
Open Paper2 and use your ellipse tool and make a Circle on paper2
Copy/Paste
Place in Frame1
Open frame4 and place in front of frame1

Open These Elements and use the same dropshadow as above and resize to your liking!!!

Grass (duplicate 2x)
Tree2 (duplicate 1x)
Tree3 (duplicate 1x)
Bridge
Flower3 (duplicate 1x)
Sparkles (duplicate 1x)

Now dropshadow your elements with these settings.

Filters, Light And Shadows...DropShadow
Offset X - 9
Offset Y - 9
Blur Radius - 15
Opacity - 75
Color - #000000
Allow Resizing

Now resize your tag to 600x600 if you would like.

When you are happy with your tag..
Add Copyright!!
Add Name!!
Merge All Layers!
Save!
Enjoy!!

Hope you enjoyed my tutorial.
Photobucket

Wednesday, June 26, 2013

FTU - Pool Party


This tutorial was written by me on June 26th, 2013. Please do not claim as your own. Any resemblance to any other tutorial is purely coincidental.
------------------------------------------------
Mask Of Choice

Scrap Kit - FTU Scrap kit by Melissaz Creationz
You can download the kit here

Font Of Choice

Tube Of Choice - Artwork by VeryMany. You must obtain a license from PFD to use this tube.

Program - Gimp 2.6..but any program will do.

Template By: By Millie
--------------------------------------------

Open New Canvas
I did 650x650.you can resize it at the end if you would like.

Open Mask
Right click on your layers
Go down to alpha by selection
Edit > fill w/ BG color - Make sure color is #FFFFFF

Open Paper 9
Right click on your layers
Click add layer mask
Then a window will pop up
then click black (full transparency)
Then click add
Edit > Copy
Edit > Paste
On Layers > click on floating selection
Then right click on layers
scroll down to anchor layer
Delete first layer!!!

You should have a mask..then a black square next to it on your layers.
Image > Merge Visible Layers
Box should pop up..click clipped to image > Merge

-----------------------------------------------------------------

Ready...
Set...
Go...

Open template
Delete your credit layer.

Layer1 - Paper10
Layer2 - Paper11
Layer3 - Paper2
Layer4 - Paper2
Layer5 - Paper7
Layer6 - Paper7
Layer7 - Paper5

Open These Elements and use the same dropshadow as above and resize to your liking!!!

E1
E2
E7
E15
E22
E29
E31
E32
E34
E37
E40

Now dropshadow your elements with these settings.

Filters, Light And Shadows...DropShadow
Offset X - 9
Offset Y - 9
Blur Radius - 15
Opacity - 73
Color - #000000
Allow Resizing

Now resize your tag to 600x600 if you would like.

When you are happy with your tag..
Add Copyright!!
Add Name!!
Merge All Layers!
Save!
Enjoy!!

Hope you enjoyed my tutorial.
Photobucket

Monday, June 24, 2013

PTU - Funky Music

This tutorial was written by me on June 24th, 2013. Please do not claim as your own. Any resemblance to any other tutorial is purely coincidental.
------------------------------------------------
Mask Of Choice

Scrap Kit - PTU scrap kit called V is For Varity by Scrappin Krazy Designs
You can purchase the kit at any of her stores on her blog

Font Of Choice

Tube Of Choice - Artwork by Keith Garvey. You must have the proper license to use this tube.

Wordart: By Millie

Program - Gimp 2.6..but any program will do.

--------------------------------------------

Open New Canvas
I did 650x650.you can resize it at the end if you would like.

Open Mask
Right click on your layers
Go down to alpha by selection
Edit > fill w/ BG color - Make sure color is #FFFFFF

Open Paper 8
Right click on your layers
Click add layer mask
Then a window will pop up
then click black (full transparency)
Then click add
Edit > Copy
Edit > Paste
On Layers > click on floating selection
Then right click on layers
scroll down to anchor layer
Delete first layer!!!

You should have a mask..then a black square next to it on your layers.
Image > Merge Visible Layers
Box should pop up..click clipped to image > Merge

-----------------------------------------------------------------

Ready...
Set...
Go...

Open Frame3
Open Paper5 and use your rectangle tool and make a rectangle on paper5
Copy/Paste
Place in Frame3

Now open paper5 again and use your ellipse tool and make a circle on paper5
Copy/Paste
Place in the circles of frame3

Open your full body tube
Place to the left of your frame.

Open close up and place inside frame3
change mode to value

Open These Elements and use the same dropshadow as above and resize to your liking!!!

Sparkle2
Rings2
Glitter Spray2
Lipstick1
Ipod1
Lips
Disco Ball

Now dropshadow your elements with these settings.

Filters, Light And Shadows...DropShadow
Offset X - 9
Offset Y - 9
Blur Radius - 15
Opacity - 75
Color - #000000
Allow Resizing

Now resize your tag to 600x600 if you would like.

When you are happy with your tag..
Add Copyright!!
Add Name!!
Merge All Layers!
Save!
Enjoy!!

Hope you enjoyed my tutorial.
Photobucket

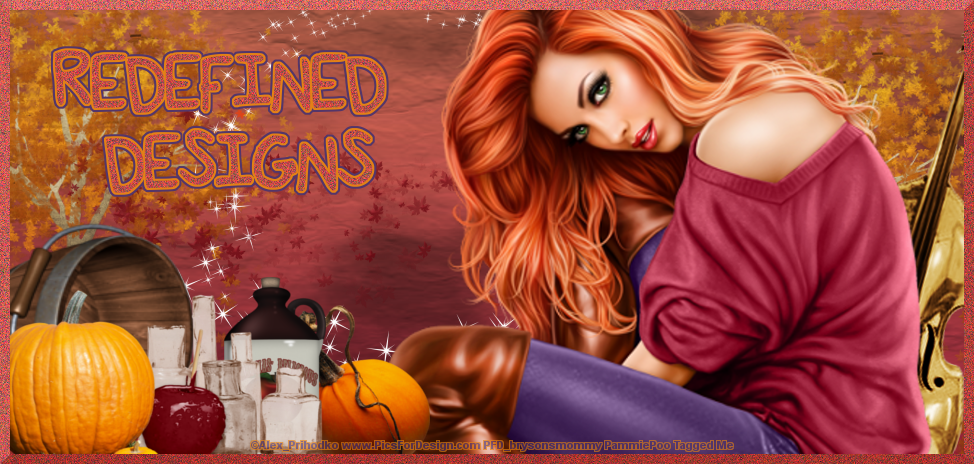
PTU - Deep In The Ocean


This tutorial was written by me on June 24th, 2013. Please do not claim as your own. Any resemblance to any other tutorial is purely coincidental.
------------------------------------------------
Mask Of Choice

Scrap Kit - PTU scrap kit called Deep In The Ocean By Shells Scraps
You can purchase the kit here

Font Of Choice

Tube Of Choice - Artwork by Alex Prihodko. You must obtain a license from PFD to use this tube.

Program - Gimp 2.6..but any program will do.

--------------------------------------------

Open New Canvas
I did 650x650.you can resize it at the end if you would like.

Open Mask
Right click on your layers
Go down to alpha by selection
Edit > fill w/ BG color - Make sure color is #FFFFFF

Open Paper 1
Right click on your layers
Click add layer mask
Then a window will pop up
then click black (full transparency)
Then click add
Edit > Copy
Edit > Paste
On Layers > click on floating selection
Then right click on layers
scroll down to anchor layer
Delete first layer!!!

You should have a mask..then a black square next to it on your layers.
Image > Merge Visible Layers
Box should pop up..click clipped to image > Merge

-----------------------------------------------------------------

Ready...
Set...
Go...

Open Frame1
Open These Elements and use the same dropshadow as above and resize to your liking!!!

Coral2 (duplicate 3x)
Turtle1
SeaPlant2
Lighthouse
Anchor1
Dolphin1
Clam2
Jellyfish1

Now dropshadow your elements with these settings.

Filters, Light And Shadows...DropShadow
Offset X - 9
Offset Y - 9
Blur Radius - 15
Opacity - 75
Color - #000000
Allow Resizing

Now resize your tag to 600x600 if you would like.

When you are happy with your tag..
Add Copyright!!
Add Name!!
Merge All Layers!
Save!
Enjoy!!

Hope you enjoyed my tutorial.
Photobucket

Sunday, June 23, 2013

PTU - Enamorte

This tutorial was written by me on June 23rd, 2013. Please do not claim as your own. Any resemblance to any other tutorial is purely coincidental.
------------------------------------------------
Mask Of Choice 

Scrap Kit - PTU scrap kit called Enamorte by Abstract Creations
You can purchase the kit here

Font Of Choice 

Tube Of Choice - Artwork by Enamorte. You must obtain a license from CDO to use this tube.

Program - Gimp 2.6..but any program will do.

--------------------------------------------

Open New Canvas
I did 650x650.you can resize it at the end if you would like.

Open Mask
Right click on your layers 
Go down to alpha by selection
Edit > fill w/ BG color - Make sure color is #FFFFFF

Open Paper 3
Right click on your layers
Click add layer mask
Then a window will pop up 
then click black (full transparency)
Then click add
Edit > Copy 
Edit > Paste
On Layers > click on floating selection
Then right click on layers
scroll down to anchor layer
Delete first layer!!!

You should have a mask..then a black square next to it on your layers.
Image > Merge Visible Layers 
Box should pop up..click clipped to image > Merge

-----------------------------------------------------------------

Ready...
Set...
Go...

Open Frame2
Open Paper4 and use your rectangle tool and make a rectangle on paper4
Copy/Paste
Place in Frame2

Open These Elements and use the same dropshadow as above and resize to your liking!!!

E4
E16
E13
E15
E11
E9
E7
E17

Now dropshadow your elements with these settings.

Filters, Light And Shadows...DropShadow
Offset X - 9
Offset Y - 9
Blur Radius - 15
Opacity - 75
Color - #000000
Allow Resizing

Now resize your tag to 600x600 if you would like. 

When you are happy with your tag..
Add Copyright!!
Add Name!!
Merge All Layers!
Save!
Enjoy!!

Hope you enjoyed my tutorial. 

Photobucket

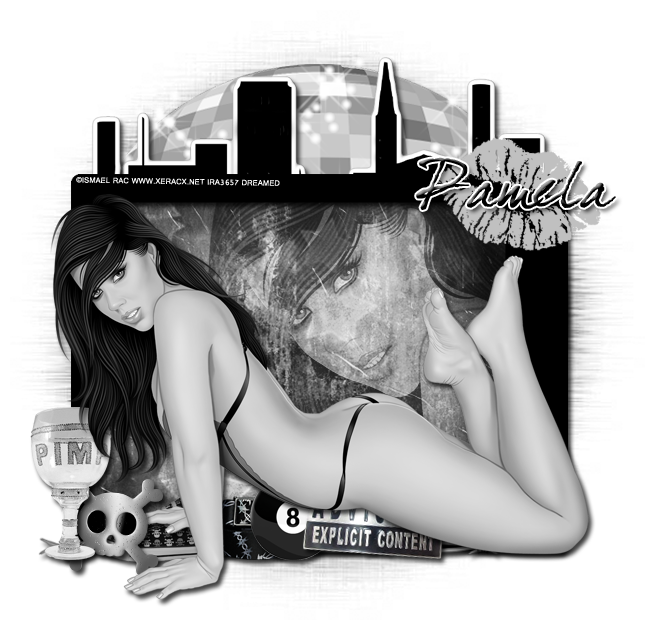
PTU - City Girl

This tutorial was written by me on June 23rd, 2013. Please do not claim as your own. Any resemblance to any other tutorial is purely coincidental.
------------------------------------------------
Mask Of Choice 

Scrap Kit - PTU scrap kit called City Girl By Irish Princess Designs
You can purchase the kit at any of the stores she sells at on her blog

Font Of Choice 

Tube Of Choice - Artwork by Pin Up Toons. You must have the proper license from CDO to use this tube. 

Program - Gimp 2.6..but any program will do.

--------------------------------------------

Open New Canvas
I did 650x650.you can resize it at the end if you would like.

Open Mask
Right click on your layers 
Go down to alpha by selection
Edit > fill w/ BG color - Make sure color is #FFFFFF

Open Paper 10
Right click on your layers
Click add layer mask
Then a window will pop up 
then click black (full transparency)
Then click add
Edit > Copy 
Edit > Paste
On Layers > click on floating selection
Then right click on layers
scroll down to anchor layer
Delete first layer!!!

You should have a mask..then a black square next to it on your layers.
Image > Merge Visible Layers 
Box should pop up..click clipped to image > Merge

-----------------------------------------------------------------

Ready...
Set...
Go...

Open Frame1
Open Paper9 and use your rectangle tool and make a rectangle on paper9
Copy/Paste
Place in Frame1

Open These Elements and use the same dropshadow as above and resize to your liking!!!

City
Street Lamp
Bubbles
Cupcake
Disco Ball
Halftone
Money
Perfume
Shaker
Sparkles
Stop light
Street Sign
Taxi
Wine

Now dropshadow your elements with these settings.

Filters, Light And Shadows...DropShadow
Offset X - 9
Offset Y - 9
Blur Radius - 15
Opacity - 75
Color - #000000
Allow Resizing

Now resize your tag to 600x600 if you would like. 

When you are happy with your tag..
Add Copyright!!
Add Name!!
Merge All Layers!
Save!
Enjoy!!

Hope you enjoyed my tutorial. 

Photobucket

Friday, June 21, 2013

PTU - Emoshun

This tutorial was written by me on June 21st, 2013. Please do not claim as your own. Any resemblance to any other tutorial is purely coincidental.
------------------------------------------------
Mask Of Choice 

Scrap Kit - PTU scrap kit by Emoshun 3 By Krissys Scraps
You can purchase the kit here 

Font Of Choice 

Tube Of Choice - Artwork by Pin Up Toons. You must have a license from CDO to use this tube. 
/‎
Program - Gimp 2.6..but any program will do.

--------------------------------------------

Open New Canvas
I did 650x650.you can resize it at the end if you would like.

Open Mask
Right click on your layers 
Go down to alpha by selection
Edit > fill w/ BG color - Make sure color is #FFFFFF

Open Paper 4
Right click on your layers
Click add layer mask
Then a window will pop up 
then click black (full transparency)
Then click add
Edit > Copy 
Edit > Paste
On Layers > click on floating selection
Then right click on layers
scroll down to anchor layer
Delete first layer!!!

You should have a mask..then a black square next to it on your layers.
Image > Merge Visible Layers 
Box should pop up..click clipped to image > Merge

-----------------------------------------------------------------

Ready...
Set...
Go...

Open Frame1
Open Paper14 and use your rectangle tool and make a circle on paper14
Copy/Paste
Place in Frame1

Open These Elements and use the same dropshadow as above and resize to your liking!!!

Cupcake2
Rosebud1
Bottle Cap1
Flower1
Flower2
Flower3
Giant Sucker
Lipstick2
Razor Blade1
Sparkles3
Spiked Heart1

Now dropshadow your elements with these settings.

Filters, Light And Shadows...DropShadow
Offset X - 9
Offset Y - 9
Blur Radius - 15
Opacity - 75
Color - #000000
Allow Resizing

Now resize your tag to 600x600 if you would like. 

When you are happy with your tag..
Add Copyright!!
Add Name!!
Merge All Layers!
Save!
Enjoy!!

Hope you enjoyed my tutorial. 
Photobucket

Wednesday, June 19, 2013

PTU - Steampunk Girl

This tutorial was written by me on June 19th, 2013. Please do not claim as your own. Any resemblance to any other tutorial is purely coincidental.
------------------------------------------------
Mask Of Choice

Scrap Kit - PTU scrap kit by Irish Princess Designs called Steampunk Girl
You can purchase the kit at any of the stores she sells at on her blog

Font Of Choice

Tube Of Choice - Artwork by Verymany. You must obtain a license to use this tube.

Program - Gimp 2.6..but any program will do.

Template: By Me
--------------------------------------------

Open New Canvas
I did 650x650.you can resize it at the end if you would like.

Open Mask
Right click on your layers
Go down to alpha by selection
Edit > fill w/ BG color - Make sure color is #FFFFFF

Open Paper 2
Right click on your layers
Click add layer mask
Then a window will pop up
then click black (full transparency)
Then click add
Edit > Copy
Edit > Paste
On Layers > click on floating selection
Then right click on layers
scroll down to anchor layer
Delete first layer!!!

You should have a mask..then a black square next to it on your layers.
Image > Merge Visible Layers
Box should pop up..click clipped to image > Merge

-----------------------------------------------------------------

Ready...
Set...
Go...

Background - Paper 1
New Layer 1 - Paper6
New Layer 3 - Paper 2
New Layer 5 - Paper 3
New Layer 7 - Paper 8
New Layer 8 - Paper 8

Open These Elements and use the same dropshadow as above and resize to your liking!!!

Tedrils2 (duplicate 1x and flip)
Lace
Barrel
Binoculars
Books
Box Of Pearls
Cage
Clock1
Cluster1
Cluster2
Grandfather Clock
Hat
Perfume
Sparkles
Stack


Now dropshadow your elements with these settings.

Filters, Light And Shadows...DropShadow
Offset X - 9
Offset Y - 9
Blur Radius - 15
Opacity - 75
Color - #000000
Allow Resizing

Now resize your tag to 600x600 if you would like.

When you are happy with your tag..
Add Copyright!!
Add Name!!
Merge All Layers!
Save!
Enjoy!!

Hope you enjoyed my tutorial.
Photobucket

Monday, June 17, 2013

CT Tag/tutorial Showoff

My CT member Andrea made this awesome tag using my kiss my attitude scrap kit. You can find the kit at any of my stores to the left of my blog. You can find the tutorial here


Photobucket

Sunday, June 16, 2013

PTU - Vampish

This tutorial was written by me on June 16th, 2013. Please do not claim as your own. Any resemblance to any other tutorial is purely coincidental.
------------------------------------------------
Mask Of Choice 

Scrap Kit - PTU scrap kit by Vampish by Devilish Dezines
You can purchase the kit here 

Font Of Choice 

Tube Of Choice - Artwork by Misticheskaya. You must have the proper license from SATC to use this tube. 

Program - Gimp 2.6..but any program will do.

--------------------------------------------

Open New Canvas
I did 650x650.you can resize it at the end if you would like.

Open Mask
Right click on your layers 
Go down to alpha by selection
Edit > fill w/ BG color - Make sure color is #FFFFFF

Open Paper 2
Right click on your layers
Click add layer mask
Then a window will pop up 
then click black (full transparency)
Then click add
Edit > Copy 
Edit > Paste
On Layers > click on floating selection
Then right click on layers
scroll down to anchor layer
Delete first layer!!!

You should have a mask..then a black square next to it on your layers.
Image > Merge Visible Layers 
Box should pop up..click clipped to image > Merge

-----------------------------------------------------------------

Ready...
Set...
Go...

Open Frame4
Open Paper5 and use your ellipse tool and make a circle on paper5
Copy/Paste
Place in Frame4

Now open frame6
Place behind frame4

Open These Elements and use the same dropshadow as above and resize to your liking!!!

Element 9 (duplicate 1x) 
Element11
Element 72 (duplicate 2x)
Element63
Element48
Element51
Element50 (duplicate 1x and flip)
Element37
Element1


Now dropshadow your elements with these settings.

Filters, Light And Shadows...DropShadow
Offset X - 9
Offset Y - 9
Blur Radius - 15
Opacity - 75
Color - #000000
Allow Resizing

Now resize your tag to 600x600 if you would like. 

When you are happy with your tag..
Add Copyright!!
Add Name!!
Merge All Layers!
Save!
Enjoy!!

Hope you enjoyed my tutorial. 

Photobucket

Saturday, June 15, 2013

The Fantastically Free Blog Train - Summer Freshness

This was my first blog train with The Fantastically Free Blog Train. It was super fun since it was summer related and I love doing summer scrap kits. Here is my part.


DOWNLOAD HERE

**********************
**********************


Friday, June 14, 2013

[FREEBIE] Mermaid Treasures Cluster Frame

I used the beautiful scrap kit by Jackie's Jewels called Mermaid Treasures. You can find the purchase information on her blog.

Artwork By Elias Chatzoudis 
Download Cluster Here

Photobucket

Thursday, June 13, 2013

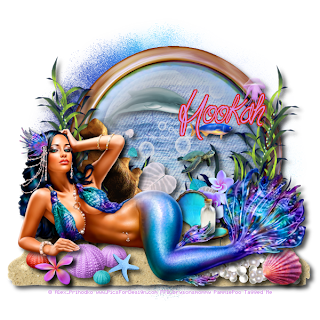
PTU - Mermaid Treasures

This tutorial was written by me on June 10th, 2013. Please do not claim as your own. Any resemblance to any other tutorial is purely coincidental.
------------------------------------------------
Mask Of Choice 

Scrap Kit - PTU scrap kit by Jackie's Jewels called Mermaid Treasures
You can find the purchase info on her blog

Font Of Choice 

Tube Of Choice - Artwork by Alex Prihodko.  You must have a license from PFD to use this tube

Program - Gimp 2.6..but any program will do.

--------------------------------------------

Open New Canvas
I did 650x650.you can resize it at the end if you would like.

Open Mask
Right click on your layers 
Go down to alpha by selection
Edit > fill w/ BG color - Make sure color is #FFFFFF

Open Paper 6
Right click on your layers
Click add layer mask
Then a window will pop up 
then click black (full transparency)
Then click add
Edit > Copy 
Edit > Paste
On Layers > click on floating selection
Then right click on layers
scroll down to anchor layer
Delete first layer!!!

You should have a mask..then a black square next to it on your layers.
Image > Merge Visible Layers 
Box should pop up..click clipped to image > Merge

-----------------------------------------------------------------

Ready...
Set...
Go...


Open These Elements and use the same dropshadow as above and resize to your liking!!!

Port Hole
Sand
Dolphin
Bubbles
Sea Structure
Sea Weed (duplicate 1x)
Sea Turtle
Flowers
Clam Shell
Bottle
Star Fish 2 
Shell 3
Sea Leaves
JellyFish3
Urchins
Sea Deco
Fish4

Now dropshadow your elements with these settings.

Filters, Light And Shadows...DropShadow
Offset X - 9
Offset Y - 9
Blur Radius - 15
Opacity - 75
Color - #000000
Allow Resizing

Now resize your tag to 600x600 if you would like. 

When you are happy with your tag..
Add Copyright!!
Add Name!!
Merge All Layers!
Save!
Enjoy!!

Hope you enjoyed my tutorial. 
Photobucket

Tuesday, June 11, 2013

Urban Addiction Snags

I made these using the awesome scrap kit by Abstract Creations called Urban Addiction. You can pick up this kit here

Tag For Abstract


Here are some snags i've made for you. Please comment if you snag any!!


Photobucket

Monday, June 10, 2013

PTU - Toxic Rawk

This tutorial was written by me on June 10th, 2013. Please do not claim as your own. Any resemblance to any other tutorial is purely coincidental.
------------------------------------------------
Mask Of Choice 

Scrap Kit - PTU scrap kit by Irish Princess Designs called Toxic Rawk
You can purchase the kit at any of the stores She sells at on her blog

Font Of Choice 

Tube Of Choice - Artwork by Zlata_M. You must have a license from PFD to use this tube

Program - Gimp 2.6..but any program will do.

--------------------------------------------

Open New Canvas
I did 650x650.you can resize it at the end if you would like.

Open Mask
Right click on your layers 
Go down to alpha by selection
Edit > fill w/ BG color - Make sure color is #FFFFFF

Open Paper 1
Right click on your layers
Click add layer mask
Then a window will pop up 
then click black (full transparency)
Then click add
Edit > Copy 
Edit > Paste
On Layers > click on floating selection
Then right click on layers
scroll down to anchor layer
Delete first layer!!!

You should have a mask..then a black square next to it on your layers.
Image > Merge Visible Layers 
Box should pop up..click clipped to image > Merge

-----------------------------------------------------------------

Ready...
Set...
Go...

Open Frame1
Open Paper9 and use your ellipse tool and make a circle on paper9 place in Frame1

Open These Elements and use the same dropshadow as above and resize to your liking!!!

Barrel
Bear
Bottle
Box
Cherry
Cupcake
Fence
GasMask
Jello Shot
Microphone
Notes
Polish
Punk Skull
Scatter
Sparkles
Speakers
StageLights
Toxic

Now dropshadow your elements with these settings.

Filters, Light And Shadows...DropShadow
Offset X - 9
Offset Y - 9
Blur Radius - 15
Opacity - 78
Color - #000000
Allow Resizing

Now resize your tag to 600x600 if you would like. 

When you are happy with your tag..
Add Copyright!!
Add Name!!
Merge All Layers!
Save!
Enjoy!!

Hope you enjoyed my tutorial. 
Photobucket

PTU - Girls Night Out

This tutorial was written by me on June 10th, 2013. Please do not claim as your own. Any resemblance to any other tutorial is purely coincidental.
------------------------------------------------
Mask Of Choice 

Scrap Kit - PTU scrap kit by Abstract Creations called Girls Night Out 
You can purchase the kit here 

Font Of Choice 

Tube Of Choice - Artwork by VeryMany. You must have a license from PFD to use this tube

Program - Gimp 2.6..but any program will do.

--------------------------------------------

Open New Canvas
I did 650x650.you can resize it at the end if you would like.

Open Mask
Right click on your layers 
Go down to alpha by selection
Edit > fill w/ BG color - Make sure color is #FFFFFF

Open Paper 1
Right click on your layers
Click add layer mask
Then a window will pop up 
then click black (full transparency)
Then click add
Edit > Copy 
Edit > Paste
On Layers > click on floating selection
Then right click on layers
scroll down to anchor layer
Delete first layer!!!

You should have a mask..then a black square next to it on your layers.
Image > Merge Visible Layers 
Box should pop up..click clipped to image > Merge

-----------------------------------------------------------------

Ready...
Set...
Go...

Open Element51
Open Paper8 and use your ellipse tool and make a circle on paper8 place in element51

Open These Elements and use the same dropshadow as above and resize to your liking!!!

ele01
ele10
ele11
ele13
ele17
ele28
ele30
ele43
ele44
ele52
ele54
ele7

Now dropshadow your elements with these settings.

Filters, Light And Shadows...DropShadow
Offset X - 9
Offset Y - 9
Blur Radius - 15
Opacity - 75
Color - #000000
Allow Resizing

Now resize your tag to 600x600 if you would like. 

When you are happy with your tag..
Add Copyright!!
Add Name!!
Merge All Layers!
Save!
Enjoy!!

Hope you enjoyed my tutorial. 
Photobucket

PTU - Autumn's Song

This tutorial was written by me on June 10th, 2013. Please do not claim as your own. Any resemblance to any other tutorial is purely coincidental.
------------------------------------------------
Mask Of Choice 

Scrap Kit - PTU scrap kit by Scrappin Krazy Designs called Autumn's Song
You can purchase the kit at any of the stores she sells at on her blog

Font Of Choice 

Tube Of Choice - Artwork By Alex Prihodko. You must obtain a license from PFD to use this tube. 

Program - Gimp 2.6..but any program will do.

--------------------------------------------

Open New Canvas
I did 650x650.you can resize it at the end if you would like.

Open Mask
Right click on your layers 
Go down to alpha by selection
Edit > fill w/ BG color - Make sure color is #FFFFFF

Open Paper 11
Right click on your layers
Click add layer mask
Then a window will pop up 
then click black (full transparency)
Then click add
Edit > Copy 
Edit > Paste
On Layers > click on floating selection
Then right click on layers
scroll down to anchor layer
Delete first layer!!!

You should have a mask..then a black square next to it on your layers.
Image > Merge Visible Layers 
Box should pop up..click clipped to image > Merge

-----------------------------------------------------------------

Ready...
Set...
Go...

Open Element21
Open Paper3 and use your rectangle tool and place in element21
Now open tube and place inside element21 and change mode to value
Now go to filters > Artistic > Apple Canvas

Open tube again and place in middle

Open These Elements and use the same dropshadow as above and resize to your liking!!!

ele02
ele11
ele14
ele19
ele20
ele22
ele23
ele26
ele38
ele50
ele53
ele60
ele63
ele67

Now dropshadow your elements with these settings.

Filters, Light And Shadows...DropShadow
Offset X - 9
Offset Y - 9
Blur Radius - 15
Opacity - 73
Color - #000000
Allow Resizing

Now resize your tag to 600x600 if you would like. 

When you are happy with your tag..
Add Copyright!!
Add Name!!
Merge All Layers!
Save!
Enjoy!!

Hope you enjoyed my tutorial. 
Photobucket

Sunday, June 9, 2013

New Kit Now In Stores - Elegance Enchanted

This kit contains 36 elements, 17 papers and 4 frames. You can purchase this kit at any of the stores I sell at on the left my blog.


Photobucket