Pages

Friday, January 31, 2014

FTU - Dear Edward

This tutorial was written by me on January 31st, 2014. Please do not claim as your own. Any resemblance to any other tutorial is purely coincidental.
------------------------------------------------
Mask Of Choice 

Scrap Kit - FTU scrapkit called Los Muertos By Gimptastic Scraps 
You can purchase the kit here

Font Of Choice 

Tube Of Choice - Artwork by Eclipsy. You must obtain a license from The PSP Project to use this tube.

Program - Gimp 2.6..but any program will do.

--------------------------------------------

Open New Canvas
I did 650x650.you can resize it at the end if you would like.

Open Mask
Right click on your layers 
Go down to alpha by selection
Edit > fill w/ BG color - Make sure color is #FFFFFF

Open Paper 9
Right click on your layers
Click add layer mask
Then a window will pop up 
then click black (full transparency)
Then click add
Edit > Copy 
Edit > Paste
On Layers > click on floating selection
Then right click on layers
scroll down to anchor layer
Delete first layer!!!

You should have a mask..then a black square next to it on your layers.
Image > Merge Visible Layers 
Box should pop up..click clipped to image > Merge

-----------------------------------------------------------------

Ready...
Set...
Go...

Open Frame5
duplicate Frame5 twice
Now open Paper3  . You use ellipse tool and make a circle on paper3
Copy/Paste inside Frame5

Open These Elements and use the same dropshadow as above and resize to your liking!!!

Black Cat
Bottle
Bottles
Coffin
'Corset
Crow
Flower3 (duplicate 15x)
Feather (duplicate 1x and flip)
Hammer & Stake
Holy Water

Now dropshadow your elements with these settings.

Filters, Light And Shadows...DropShadow
Offset X - 9
Offset Y - 9
Blur Radius - 15
Opacity - 74
Color - #000000
Allow Resizing

Now resize your tag to 600x600 if you would like. 

When you are happy with your tag..
Add Copyright!!
Add Name!!
Merge All Layers!
Save!
Enjoy!!

Hope you enjoyed my tutorial. 
Wednesday, January 29, 2014

PTU - Feels Like Paradise


This tutorial was written by me on January 29th,2014. Please do not claim as your own. Any resemblance to any other tutorial is purely coincidental.
------------------------------------------------
Mask Of Choice 

Scrap Kit - PTU scrap kit called Feels Like Paradise By Tasha's Playground
You can purchase the kit here

Font Of Choice 

Tube Of Choice - Artwork by Ismael Rac. You must obtain a license from his store to use this tube.

Program - Gimp 2.6..but any program will do.

--------------------------------------------

Open New Canvas
I did 650x650.you can resize it at the end if you would like.

Open Mask
Right click on your layers 
Go down to alpha by selection
Edit > fill w/ BG color - Make sure color is #FFFFFF

Open Paper 7
Right click on your layers
Click add layer mask
Then a window will pop up 
then click black (full transparency)
Then click add
Edit > Copy 
Edit > Paste
On Layers > click on floating selection
Then right click on layers
scroll down to anchor layer
Delete first layer!!!

You should have a mask..then a black square next to it on your layers.
Image > Merge Visible Layers 
Box should pop up..click clipped to image > Merge

-----------------------------------------------------------------

Ready...
Set...
Go...

Open Frame1
Now open Paper3  . You use rectangle tool and make a square on paper3
Copy/Paste inside frame1

Open These Elements and use the same dropshadow as above and resize to your liking!!!

Bottle1
Dolphin1
Drink1
Flamingo2
Flower7
Lime
Palm Tree
Rocks
Sand2
Sparkle1
Waves
Wordart

Now dropshadow your elements with these settings.

Filters, Light And Shadows...DropShadow
Offset X - 9
Offset Y - 9
Blur Radius - 15
Opacity - 74
Color - #000000
Allow Resizing

Now resize your tag to 600x600 if you would like. 

When you are happy with your tag..
Add Copyright!!
Add Name!!
Merge All Layers!
Save!
Enjoy!!

Hope you enjoyed my tutorial. 

Tuesday, January 28, 2014

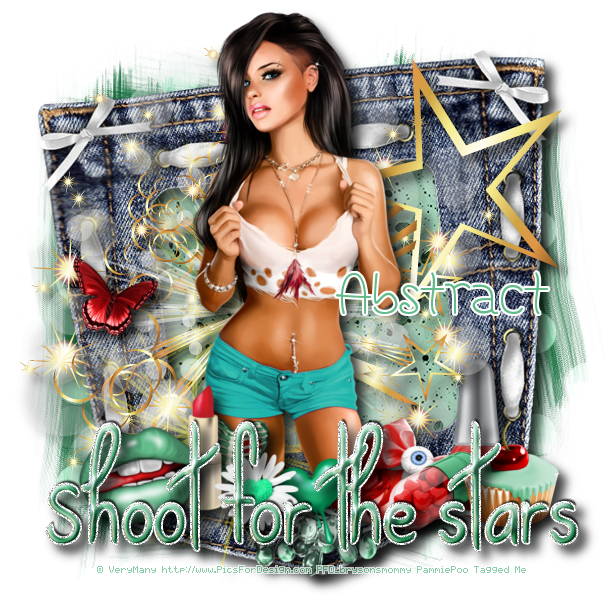
PTU - Shoot For The Stars


This tutorial was written by me on January 28. Please do not claim as your own. Any resemblance to any other tutorial is purely coincidental.
------------------------------------------------
Mask Of Choice 

Scrap Kit - PTU scrap kit called IB_Anne Marine 50-2 By Abstract Creationz
You can purchase the kit here

Font Of Choice 

Tube Of Choice - Artwork by VeryMany. You must obtain a license from PFD to use this tube.

Program - Gimp 2.6..but any program will do.

--------------------------------------------

Open New Canvas
I did 650x650.you can resize it at the end if you would like.

Open Mask
Right click on your layers 
Go down to alpha by selection
Edit > fill w/ BG color - Make sure color is #FFFFFF

Open Paper 3
Right click on your layers
Click add layer mask
Then a window will pop up 
then click black (full transparency)
Then click add
Edit > Copy 
Edit > Paste
On Layers > click on floating selection
Then right click on layers
scroll down to anchor layer
Delete first layer!!!

You should have a mask..then a black square next to it on your layers.
Image > Merge Visible Layers 
Box should pop up..click clipped to image > Merge

-----------------------------------------------------------------

Ready...
Set...
Go...

Open frame1
Now open Paper1  . You use ractangle tool and make a square on paper1
Copy/Paste inside frame1

Open These Elements and use the same dropshadow as above and resize to your liking!!!

E1
E10
E12
E13
E14
E15
E16
E18
E19
E22
E4
E5
E6
WA1

Now dropshadow your elements with these settings.

Filters, Light And Shadows...DropShadow
Offset X - 9
Offset Y - 9
Blur Radius - 15
Opacity - 76
Color - #000000
Allow Resizing

Now resize your tag to 600x600 if you would like. 

When you are happy with your tag..
Add Copyright!!
Add Name!!
Merge All Layers!
Save!
Enjoy!!

Hope you enjoyed my tutorial. 

Sunday, January 26, 2014

PTU - Smitten

This tutorial was written by me on January 26, 2014. Please do not claim as your own. Any resemblance to any other tutorial is purely coincidental.
------------------------------------------------
Mask Of Choice 

Scrap Kit - PTU scrap kit called Love Birds By Tasha's Playground
You can purchase the kit here

Font Of Choice 

Tube Of Choice - Artwork by Keith Garvey. You must obtain a license from his store to use this tube.

Program - Gimp 2.6..but any program will do.

--------------------------------------------

Open New Canvas
I did 650x650.you can resize it at the end if you would like.

Open Mask
Right click on your layers 
Go down to alpha by selection
Edit > fill w/ BG color - Make sure color is #FFFFFF

Open Paper 6
Right click on your layers
Click add layer mask
Then a window will pop up 
then click black (full transparency)
Then click add
Edit > Copy 
Edit > Paste
On Layers > click on floating selection
Then right click on layers
scroll down to anchor layer
Delete first layer!!!

You should have a mask..then a black square next to it on your layers.
Image > Merge Visible Layers 
Box should pop up..click clipped to image > Merge

-----------------------------------------------------------------

Ready...
Set...
Go...

Open Frame3
Now open Paper11  . You use rectangle tool and make a square on paper11
Copy/Paste inside 61

Open These Elements and use the same dropshadow as above and resize to your liking!!!

Bird4
Flowers
Label
Love Trail (duplicate 1x and flip)
Notebook
Sparkles
Stamp (duplicate 1x and flip)
Star (duplicate 1x and flip)
Wordart2

Now dropshadow your elements with these settings.

Filters, Light And Shadows...DropShadow
Offset X - 9
Offset Y - 9
Blur Radius - 15
Opacity - 77
Color - #000000
Allow Resizing

Now resize your tag to 600x600 if you would like. 

When you are happy with your tag..
Add Copyright!!
Add Name!!
Merge All Layers!
Save!
Enjoy!!

Hope you enjoyed my tutorial. 
Thursday, January 23, 2014

PTU - Kisses Like Candy

This tutorial was written by me on January 23rd,2013. Please do not claim as your own. Any resemblance to any other tutorial is purely coincidental.
------------------------------------------------
Mask Of Choice 

Scrap Kit - PTU scrap kit called Kisses Like Candy By Freeks Creations
You can purchase the kit here

Font Of Choice 

Tube Of Choice - Artwork by Pin Up Toons. You must obtain a license from CDO to use this tube.

Program - Gimp 2.6..but any program will do.

--------------------------------------------

Open New Canvas
I did 650x650.you can resize it at the end if you would like.

Open Mask
Right click on your layers 
Go down to alpha by selection
Edit > fill w/ BG color - Make sure color is #FFFFFF

Open Paper 5
Right click on your layers
Click add layer mask
Then a window will pop up 
then click black (full transparency)
Then click add
Edit > Copy 
Edit > Paste
On Layers > click on floating selection
Then right click on layers
scroll down to anchor layer
Delete first layer!!!

You should have a mask..then a black square next to it on your layers.
Image > Merge Visible Layers 
Box should pop up..click clipped to image > Merge

-----------------------------------------------------------------

Ready...
Set...
Go...

Open Frame
Now open Paper4  . You use Rectangle tool and make a rectangle on paper4
Copy/Paste inside Frame

Open These Elements and use the same dropshadow as above and resize to your liking!!!

Bag
Candle
Candy Heart
Chocolate Kiss
Cupcake
Flower
Flower Box
Gift
Glass
Lips
Lolli2
Love Potion
Sparkles
Sparkles2
Tree (duplicate 1x)

Now dropshadow your elements with these settings.

Filters, Light And Shadows...DropShadow
Offset X - 9
Offset Y - 9
Blur Radius - 15
Opacity - 77
Color - #000000
Allow Resizing

Now resize your tag to 600x600 if you would like. 

When you are happy with your tag..
Add Copyright!!
Add Name!!
Merge All Layers!
Save!
Enjoy!!

Hope you enjoyed my tutorial. 

Saturday, January 18, 2014

PTU - Midnight Rendezvous

This tutorial was written by me on January 18. Please do not claim as your own. Any resemblance to any other tutorial is purely coincidental.
------------------------------------------------
Mask Of Choice 

Scrap Kit - PTU scrap kit called Midnight Rendezvous by Tasha's Playground
You can purchase the kit here

Font Of Choice 

Tube Of Choice - Artwork by Verymany. You must obtain a license from PFD to use this tube.

Program - Gimp 2.6..but any program will do.

--------------------------------------------

Open New Canvas
I did 650x650.you can resize it at the end if you would like.

Open Mask
Right click on your layers 
Go down to alpha by selection
Edit > fill w/ BG color - Make sure color is #FFFFFF

Open Paper 4
Right click on your layers
Click add layer mask
Then a window will pop up 
then click black (full transparency)
Then click add
Edit > Copy 
Edit > Paste
On Layers > click on floating selection
Then right click on layers
scroll down to anchor layer
Delete first layer!!!

You should have a mask..then a black square next to it on your layers.
Image > Merge Visible Layers 
Box should pop up..click clipped to image > Merge

-----------------------------------------------------------------

Ready...
Set...
Go...

Open Frame4
Now open Paper6  . You use rectangle tool and make a square on paper6
Copy/Paste Frame4

Open These Elements and use the same dropshadow as above and resize to your liking!!!

Book
Bottle
Bottle2
Candles
Castle
Charm
Cuffs
Glow
Leaves1 (duplicate 1x)
Leaves3
Mask
Moon

Now dropshadow your elements with these settings.

Filters, Light And Shadows...DropShadow
Offset X - 9
Offset Y - 9
Blur Radius - 15
Opacity - 77
Color - #000000
Allow Resizing

Now resize your tag to 600x600 if you would like. 

When you are happy with your tag..
Add Copyright!!
Add Name!!
Merge All Layers!
Save!
Enjoy!!

Hope you enjoyed my tutorial. 

Thursday, January 16, 2014

PTU - Just A Note

This tutorial was written by me on January 16th, 2014. Please do not claim as your own. Any resemblance to any other tutorial is purely coincidental.
------------------------------------------------
Mask Of Choice 

Scrap Kit - PTU scrap kit called Just A Note By Gemini Creationz
You can purchase the kit here

Font Of Choice 

Tube Of Choice - Artwork by Keith Garvey. You must obtain a license from his store to use this tube.

Program - Gimp 2.6..but any program will do.

--------------------------------------------

Open New Canvas
I did 650x650.you can resize it at the end if you would like.

Open Mask
Right click on your layers 
Go down to alpha by selection
Edit > fill w/ BG color - Make sure color is #FFFFFF

Open Paper 5
Right click on your layers
Click add layer mask
Then a window will pop up 
then click black (full transparency)
Then click add
Edit > Copy 
Edit > Paste
On Layers > click on floating selection
Then right click on layers
scroll down to anchor layer
Delete first layer!!!

You should have a mask..then a black square next to it on your layers.
Image > Merge Visible Layers 
Box should pop up..click clipped to image > Merge

-----------------------------------------------------------------

Ready...
Set...
Go...

Open E45
Now open Paper4  . You use ellipse tool and make a circle on paper4
Copy/Paste inside E45

Open These Elements and use the same dropshadow as above and resize to your liking!!!

E17
E20 (Duplicate 1x and flip)
E21
E22
E23
E25
E27
E33
E36 (duplicate 1x and flip)
E51 (duplicate 1x and flip)
E67 (duplicate 1x and flip)

Now add your tube

Now dropshadow your elements with these settings.

Filters, Light And Shadows...DropShadow
Offset X - 9
Offset Y - 9
Blur Radius - 15
Opacity - 77
Color - #000000
Allow Resizing

Now resize your tag to 600x600 if you would like. 

When you are happy with your tag..
Add Copyright!!
Add Name!!
Merge All Layers!
Save!
Enjoy!!

Hope you enjoyed my tutorial. 

Monday, January 13, 2014

FTU - Steampunk Mania

This tutorial was written by me on January 13th, 2013. Please do not claim as your own. Any resemblance to any other tutorial is purely coincidental.
------------------------------------------------
Mask Of Choice 

Scrap Kit - FTU scrap kit called Steampunk Mania By Scraps Dimensions
You can download the kit here

Font Of Choice 

Tube Of Choice - Artwork by Ed van der Linden. You must obtain a license from TPP  to use this tube.

Program - Gimp 2.6..but any program will do.

--------------------------------------------

Open New Canvas
I did 650x650.you can resize it at the end if you would like.

Open Mask
Right click on your layers 
Go down to alpha by selection
Edit > fill w/ BG color - Make sure color is #FFFFFF

Open Paper 7
Right click on your layers
Click add layer mask
Then a window will pop up 
then click black (full transparency)
Then click add
Edit > Copy 
Edit > Paste
On Layers > click on floating selection
Then right click on layers
scroll down to anchor layer
Delete first layer!!!

You should have a mask..then a black square next to it on your layers.
Image > Merge Visible Layers 
Box should pop up..click clipped to image > Merge

-----------------------------------------------------------------

Ready...
Set...
Go...

Open Frame1
Now open Paper8  . You use ellipse tool and make a circle on paper8
Copy/Paste inside Frame1

Open These Elements and use the same dropshadow as above and resize to your liking!!!

Compass
Corset
Owl
Padlock
Phone
Radio
Street Lamp
WA
World Globe

Now dropshadow your elements with these settings.

Filters, Light And Shadows...DropShadow
Offset X - 9
Offset Y - 9
Blur Radius - 15
Opacity - 80
Color - #000000
Allow Resizing

Now resize your tag to 600x600 if you would like. 

When you are happy with your tag..
Add Copyright!!
Add Name!!
Merge All Layers!
Save!
Enjoy!!

Hope you enjoyed my tutorial. 

Thursday, January 9, 2014

PTU - An Evening Of Romance

This tutorial was written by me on January 9, 2013. Please do not claim as your own. Any resemblance to any other tutorial is purely coincidental.
------------------------------------------------
Mask Of Choice 

Scrap Kit - PTU scrap kit called An Evening Of Romance By Jackie's Jewels
You can purchase the kit here


Font Of Choice 

Tube Of Choice - Artwork by Keith Garvey. You must obtain a license from his store to use this tube.

Program - Gimp 2.6..but any program will do.

--------------------------------------------

Open New Canvas
I did 650x650.you can resize it at the end if you would like.

Open Mask
Right click on your layers 
Go down to alpha by selection
Edit > fill w/ BG color - Make sure color is #FFFFFF

Open Paper 6
Right click on your layers
Click add layer mask
Then a window will pop up 
then click black (full transparency)
Then click add
Edit > Copy 
Edit > Paste
On Layers > click on floating selection
Then right click on layers
scroll down to anchor layer
Delete first layer!!!

You should have a mask..then a black square next to it on your layers.
Image > Merge Visible Layers 
Box should pop up..click clipped to image > Merge

-----------------------------------------------------------------

Ready...
Set...
Go...

Open Frame6
Now open Paper8  . You use ellipse tool and make a circle on paper8
Copy/Paste inside Frame6

Open These Elements and use the same dropshadow as above and resize to your liking!!!

Balloons (duplicate 1x and flip)
Box Of Flowers
Candybox
Champagne Bottle
Cherub
ChocolateKiss2
Gift1
LoveWA
Mug
RoseHeart
Shoe
WAMask

Now dropshadow your elements with these settings.

Filters, Light And Shadows...DropShadow
Offset X - 9
Offset Y - 9
Blur Radius - 15
Opacity - 75
Color - #000000
Allow Resizing

Now resize your tag to 600x600 if you would like. 

When you are happy with your tag..
Add Copyright!!
Add Name!!
Merge All Layers!
Save!
Enjoy!!

Hope you enjoyed my tutorial. 

Tuesday, January 7, 2014

PTU - Candy Girl

This tutorial was written by me on January 7, 2013. Please do not claim as your own. Any resemblance to any other tutorial is purely coincidental.
------------------------------------------------
Mask Of Choice 

Scrap Kit - PTU scrap kit called Candy Girl By Abstract Creationz
You can purchase the kit here

Font Of Choice 

Tube Of Choice - Artwork by Chris Pastel. You must obtain a license from TPP to use this tube.

Program - Gimp 2.6..but any program will do.

--------------------------------------------

Open New Canvas
I did 650x650.you can resize it at the end if you would like.

Open Mask
Right click on your layers 
Go down to alpha by selection
Edit > fill w/ BG color - Make sure color is #FFFFFF

Open Paper 2
Right click on your layers
Click add layer mask
Then a window will pop up 
then click black (full transparency)
Then click add
Edit > Copy 
Edit > Paste
On Layers > click on floating selection
Then right click on layers
scroll down to anchor layer
Delete first layer!!!

You should have a mask..then a black square next to it on your layers.
Image > Merge Visible Layers 
Box should pop up..click clipped to image > Merge

-----------------------------------------------------------------

Ready...
Set...
Go...

Open f1
Now open Paper4  . You use ellipse tool and make a circle on paper4
Copy/Paste inside f1

Open These Elements and use the same dropshadow as above and resize to your liking!!!

e14
e15
e17
e2
e3
e31
e32
e34 (duplicate 1x and flip)
e5

Now dropshadow your elements with these settings.

Filters, Light And Shadows...DropShadow
Offset X - 9
Offset Y - 9
Blur Radius - 15
Opacity - 75
Color - #000000
Allow Resizing

Now resize your tag to 600x600 if you would like. 

When you are happy with your tag..
Add Copyright!!
Add Name!!
Merge All Layers!
Save!
Enjoy!!

Hope you enjoyed my tutorial. 

Friday, January 3, 2014

PTU - Iced Princess

This tutorial was written by me on January 4th, 2013. Please do not claim as your own. Any resemblance to any other tutorial is purely coincidental.
------------------------------------------------
Mask Of Choice 

Scrap Kit - PTU scrap kit called Iced Princess By Abstract Creationz
You can purchase the kit here

Font Of Choice 

Tube Of Choice - Artwork by Zlata_M. You must obtain a license from PFD to use this tube.

Program - Gimp 2.6..but any program will do.

--------------------------------------------

Open New Canvas
I did 650x650.you can resize it at the end if you would like.

Open Mask
Right click on your layers 
Go down to alpha by selection
Edit > fill w/ BG color - Make sure color is #FFFFFF

Open Paper 10
Right click on your layers
Click add layer mask
Then a window will pop up 
then click black (full transparency)
Then click add
Edit > Copy 
Edit > Paste
On Layers > click on floating selection
Then right click on layers
scroll down to anchor layer
Delete first layer!!!

You should have a mask..then a black square next to it on your layers.
Image > Merge Visible Layers 
Box should pop up..click clipped to image > Merge

-----------------------------------------------------------------

Ready...
Set...
Go...

Open f2 and f4
Now open Paper9  . You use ellipse tool and make a circle on paper9
Copy/Paste inside frames

Open These Elements and use the same dropshadow as above and resize to your liking!!!

El
E2
E10
E16
E27
E28
E3
E47
E5


Now dropshadow your elements with these settings.

Filters, Light And Shadows...DropShadow
Offset X - 9
Offset Y - 9
Blur Radius - 15
Opacity - 75
Color - #000000
Allow Resizing

Now resize your tag to 600x600 if you would like. 

When you are happy with your tag..
Add Copyright!!
Add Name!!
Merge All Layers!
Save!
Enjoy!!

Hope you enjoyed my tutorial. 

PTU - New Years Bash


This tutorial was written by me on January 2, 2013. Please do not claim as your own. Any resemblance to any other tutorial is purely coincidental.
------------------------------------------------
Mask Of Choice 

Scrap Kit - PTU scrap kit called New Years Bash By Freek's Creations
You can purchase the kit here

Font Of Choice 

Tube Of Choice - Artwork by Zlata_M. You must obtain a license from PFD.

Program - Gimp 2.6..but any program will do.

--------------------------------------------

Open New Canvas
I did 650x650.you can resize it at the end if you would like.

Open Mask
Right click on your layers 
Go down to alpha by selection
Edit > fill w/ BG color - Make sure color is #FFFFFF

Open Paper 1
Right click on your layers
Click add layer mask
Then a window will pop up 
then click black (full transparency)
Then click add
Edit > Copy 
Edit > Paste
On Layers > click on floating selection
Then right click on layers
scroll down to anchor layer
Delete first layer!!!

You should have a mask..then a black square next to it on your layers.
Image > Merge Visible Layers 
Box should pop up..click clipped to image > Merge

-----------------------------------------------------------------

Ready...
Set...
Go...

Open Frame
Now open Paper10  . You use ellipse tool and make a circle on paper10
Copy/Paste inside Frame

Open These Elements and use the same dropshadow as above and resize to your liking!!!

Accesories
Balloons (duplicate 1x and flip)
Beer
City
Clock
Firework (duplicate 1x and flip)
Mask
Popper
Splatter

Now dropshadow your elements with these settings.

Filters, Light And Shadows...DropShadow
Offset X - 9
Offset Y - 9
Blur Radius - 15
Opacity - 75
Color - #000000
Allow Resizing

Now resize your tag to 600x600 if you would like. 

When you are happy with your tag..
Add Copyright!!
Add Name!!
Merge All Layers!
Save!
Enjoy!!

Hope you enjoyed my tutorial. 

Thursday, January 2, 2014

PTU - Night To Remember

This tutorial was written by me on January 2, 2013. Please do not claim as your own. Any resemblance to any other tutorial is purely coincidental.
------------------------------------------------
Mask Of Choice 

Scrap Kit - PTU scrap kit called Night To Remember By Kissing Kate
You can purchase the kit here

Font Of Choice 

Tube Of Choice - Artwork by Zlata_m. You must obtain a license from PFD to use this tube.

Program - Gimp 2.6..but any program will do.

--------------------------------------------

Open New Canvas
I did 650x650.you can resize it at the end if you would like.

Open Mask
Right click on your layers 
Go down to alpha by selection
Edit > fill w/ BG color - Make sure color is #FFFFFF

Open Paper 6
Right click on your layers
Click add layer mask
Then a window will pop up 
then click black (full transparency)
Then click add
Edit > Copy 
Edit > Paste
On Layers > click on floating selection
Then right click on layers
scroll down to anchor layer
Delete first layer!!!

You should have a mask..then a black square next to it on your layers.
Image > Merge Visible Layers 
Box should pop up..click clipped to image > Merge

-----------------------------------------------------------------

Ready...
Set...
Go...

Open 61
Now open Paper4  . You use ellipse tool and make a circle on paper4
Copy/Paste inside 61

Open These Elements and use the same dropshadow as above and resize to your liking!!!

element14
element17
element25
element27
element40
element44
element45
element5
element72
element74
element89
element9

Now dropshadow your elements with these settings.

Filters, Light And Shadows...DropShadow
Offset X - 9
Offset Y - 9
Blur Radius - 15
Opacity - 80
Color - #000000
Allow Resizing

Now resize your tag to 600x600 if you would like. 

When you are happy with your tag..
Add Copyright!!
Add Name!!
Merge All Layers!
Save!
Enjoy!!

Hope you enjoyed my tutorial.