Pages

Thursday, October 30, 2014

PTU - Sexy Autumn

This tutorial was written by me on October 30, 2014. Please do not claim as your own. Any resemblance to any other tutorial is purely coincidental.
------------------------------------------------
Mask Of Choice 

Scrap Kit - PTU scrap kit called Sexy Autumn By Kizzed By Kelz 
You can purchase this kit here

Font Of Choice 

Tube Of Choice -  Artwork By Danny Lee. You must obtain a license from S&Co to use this tube.

Program - Gimp 2.6..but any program will do.

--------------------------------------------

Open New Canvas
I did 650x650.you can resize it at the end if you would like.

Open Mask
Right click on your layers 
Go down to alpha by selection
Edit > fill w/ BG color - Make sure color is #FFFFFF

Add your paper of choice. I used paper26

-----------------------------------------------------------------

Ready...
Set...
Go...

Open KBK_SexyAutumn (115)
Now open Paper4 and use your rectangle tool and make a square on the paper
Copy and paste as new layer and paste inside KBK_SexyAutumn (115)

Now open up the close up of your tube and c/p inside the frame. 

The elements I used were:

KBK_SexyAutumn (101)
KBK_SexyAutumn (103)
KBK_SexyAutumn (29)
KBK_SexyAutumn (30)
KBK_SexyAutumn (32)
KBK_SexyAutumn (56)
KBK_SexyAutumn (68)
KBK_SexyAutumn (78)
KBK_SexyAutumn (96)
KBK_SexyAutumn (98)

Now dropshadow your elements with these settings.

Filters, Light And Shadows...DropShadow
Offset X - 9
Offset Y - 9
Blur Radius - 15
Opacity - 76
Color - #000000
Allow Resizing

Now resize your tag to 600x600 if you would like. 

When you are happy with your tag..
Add Copyright!!
Add Name!!
Merge All Layers!
Save!
Enjoy!!

Hope you enjoyed my tutorial. 
Monday, October 27, 2014

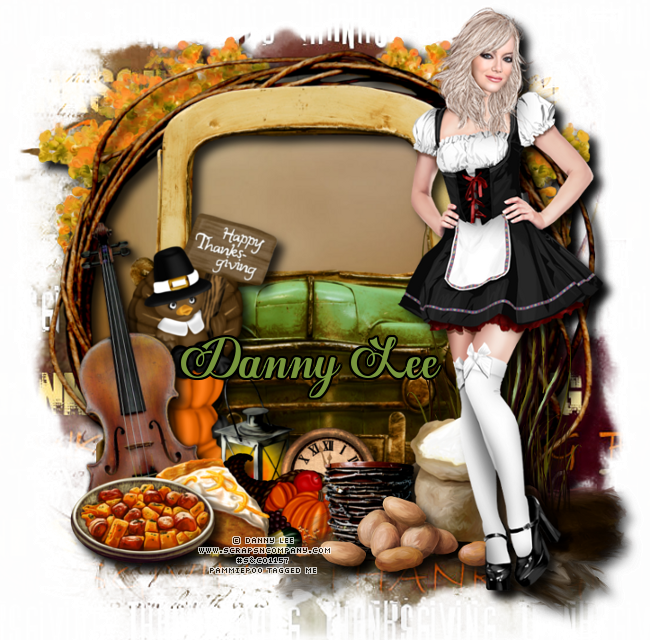
PTU - Thanksgiving Night


This tutorial was written by me on October 27, 2014. Please do not claim as your own. Any resemblance to any other tutorial is purely coincidental.
------------------------------------------------
Mask Of Choice 

Scrap Kit - PTU scrap kit called Thanksgivng Night By Bibi's Collections
You can purchase this kit here

Font Of Choice 

Tube Of Choice -  Artwork By Danny Lee. You must obtain a license from S&Co to use this tube.

Program - Gimp 2.6..but any program will do.

--------------------------------------------

Open New Canvas
I did 650x650.you can resize it at the end if you would like.

Open Mask
Right click on your layers 
Go down to alpha by selection
Edit > fill w/ BG color - Make sure color is #FFFFFF

Add your paper of choice. I used paper12

-----------------------------------------------------------------

Ready...
Set...
Go...

Open BIBITHANKSGIVINGNIGHT ELEMS (3)
Now open Paper3 and use your ellipse tool and make a circle on the paper
Copy and paste as new layer and paste inside BIBITHANKSGIVINGNIGHT ELEMS (3)

The elements I used were:

BIBITHANKSGIVINGNIGHT ELEMS (118)
BIBITHANKSGIVINGNIGHT ELEMS (12)
BIBITHANKSGIVINGNIGHT ELEMS (14)
BIBITHANKSGIVINGNIGHT ELEMS (15)
BIBITHANKSGIVINGNIGHT ELEMS (24)
BIBITHANKSGIVINGNIGHT ELEMS (29)
BIBITHANKSGIVINGNIGHT ELEMS (33)
BIBITHANKSGIVINGNIGHT ELEMS (47)
BIBITHANKSGIVINGNIGHT ELEMS (49)
BIBITHANKSGIVINGNIGHT ELEMS (69)
BIBITHANKSGIVINGNIGHT ELEMS (90)
BIBITHANKSGIVINGNIGHT ELEMS (95)


Now dropshadow your elements with these settings.

Filters, Light And Shadows...DropShadow
Offset X - 9
Offset Y - 9
Blur Radius - 15
Opacity - 76
Color - #000000
Allow Resizing

Now resize your tag to 600x600 if you would like. 

When you are happy with your tag..
Add Copyright!!
Add Name!!
Merge All Layers!
Save!
Enjoy!!

Hope you enjoyed my tutorial. 


Saturday, October 25, 2014

PTU - Early Autumn

This tutorial was written by me on October 25, 2014. Please do not claim as your own. Any resemblance to any other tutorial is purely coincidental.
------------------------------------------------
Mask Of Choice 

Scrap Kit - PTU scrap kit called Early Autumn by Tasha's Playground
You can purchase this kit here

Font Of Choice 

Tube Of Choice -  Artwork By Pin Up Toons. You must obtain a license from CDO to use this tube.

Wordart Of Choice - I'm using the wordart by Deadly Desire Tagz

Program - Gimp 2.6..but any program will do.

--------------------------------------------

Open New Canvas
I did 650x650.you can resize it at the end if you would like.

Open Mask
Right click on your layers 
Go down to alpha by selection
Edit > fill w/ BG color - Make sure color is #FFFFFF

Add your paper of choice. I used paper2

-----------------------------------------------------------------

Ready...
Set...
Go...

Open Frame2
Now open Paper4 and use your rectangle tool and make a square on the paper
Copy and paste as new layer and paste inside frame2

The elements I used were:

TP_EA_e02
TP_EA_e04
TP_EA_e06
TP_EA_e07
TP_EA_e14
TP_EA_e19
TP_EA_e22
TP_EA_e23
TP_EA_e24
TP_EA_e25
TP_EA_e26
TP_EA_e27
TP_EA_e29
TP_EA_e30
TP_EA_e33
TP_EA_e34

Now dropshadow your elements with these settings.

Filters, Light And Shadows...DropShadow
Offset X - 9
Offset Y - 9
Blur Radius - 15
Opacity - 76
Color - #000000
Allow Resizing

Now resize your tag to 600x600 if you would like. 

When you are happy with your tag..
Add Copyright!!
Add Name!!
Merge All Layers!
Save!
Enjoy!!

Hope you enjoyed my tutorial. 


Tuesday, October 21, 2014

New Kit Now In Stores - Dark Of The Night

I figured I would try my hand at making a new kit before halloween since I love halloween kits. This kit is based off alot of halloween movies I saw as a kid growing up. This kit has about 25 elements, 13 papers and 2 frames in it. You can find it at my stores I sell at to the left of my blog. 

PTU - Believe In Dark Love


This tutorial was written by me on October 21, 2014. Please do not claim as your own. Any resemblance to any other tutorial is purely coincidental.
------------------------------------------------
Mask Of Choice 

Scrap Kit - PTU scrap kit called Dark Mood By Scrapper's Gone Bad
You can purchase this kit here

Font Of Choice 

Tube Of Choice -  Artwork By tatjana art. You must obtain a license from TPP to use this tube.

Program - Gimp 2.6..but any program will do.

--------------------------------------------

Open New Canvas
I did 650x650.you can resize it at the end if you would like.

Open Mask
Right click on your layers 
Go down to alpha by selection
Edit > fill w/ BG color - Make sure color is #FFFFFF

Add your paper of choice. I used paper2

-----------------------------------------------------------------

Ready...
Set...
Go...

The elements I used were:

sdjpc-dark-mood-kit-6
sdjpc-dark-mood-kit-14
sdjpc-dark-mood-kit-29
sdjpc-dark-mood-kit-31
sdjpc-dark-mood-kit-36
sdjpc-dark-mood-kit-37
sdjpc-dark-mood-kit-38
sdjpc-dark-mood-kit-42
sdjpc-dark-mood-kit-48
sdjpc-dark-mood-kit-98
sdjpc-dark-mood-kit-34
sdjpc-dark-mood-kit-35
sdjpc-dark-mood-kit-40
sdjpc-dark-mood-kit-49


Now dropshadow your elements with these settings.

Filters, Light And Shadows...DropShadow
Offset X - 9
Offset Y - 9
Blur Radius - 15
Opacity - 76
Color - #000000
Allow Resizing

Now resize your tag to 600x600 if you would like. 

When you are happy with your tag..
Add Copyright!!
Add Name!!
Merge All Layers!
Save!
Enjoy!!

Hope you enjoyed my tutorial. 


Sunday, October 19, 2014

PTU - Ms. Frankenstein

This tutorial was written by me on October 19, 2014. Please do not claim as your own. Any resemblance to any other tutorial is purely coincidental.
------------------------------------------------
Mask Of Choice 

Scrap Kit - PTU scrap kit called Frankenstein by FwTags 
You can purchase this kit here

Font Of Choice 

Tube Of Choice -  Artwork By Andy Cooper. You must obtain a license from S&Co to use this tube.

Program - Gimp 2.6..but any program will do.

--------------------------------------------

Open New Canvas
I did 650x650.you can resize it at the end if you would like.

Open Mask
Right click on your layers 
Go down to alpha by selection
Edit > fill w/ BG color - Make sure color is #FFFFFF

Add your paper of choice. I used FwTagsFrankensteinPAPER (5)

-----------------------------------------------------------------

Ready...
Set...
Go...

The elements I used were:

FwTagsFrankensteinELEMENT (1)
FwTagsFrankensteinELEMENT (10)
FwTagsFrankensteinELEMENT (17)
FwTagsFrankensteinELEMENT (18)
FwTagsFrankensteinELEMENT (19)
FwTagsFrankensteinELEMENT (30)
FwTagsFrankensteinELEMENT (47)
FwTagsFrankensteinELEMENT (50)
FwTagsFrankensteinELEMENT (53)
FwTagsFrankensteinELEMENT (59)
FwTagsFrankensteinELEMENT (66)
FwTagsFrankensteinELEMENT (73)
FwTagsFrankensteinELEMENT (79)
FwTagsFrankensteinELEMENT (82)

Now dropshadow your elements with these settings.

Filters, Light And Shadows...DropShadow
Offset X - 9
Offset Y - 9
Blur Radius - 15
Opacity - 76
Color - #000000
Allow Resizing

Now resize your tag to 600x600 if you would like. 

When you are happy with your tag..
Add Copyright!!
Add Name!!
Merge All Layers!
Save!
Enjoy!!

Hope you enjoyed my tutorial. 


Saturday, October 18, 2014

PTU - Royal Bloody Vamp

This tutorial was written by me on October 18, 2014. Please do not claim as your own. Any resemblance to any other tutorial is purely coincidental.
------------------------------------------------
Mask Of Choice 

Scrap Kit - PTU scrap kit called Royal Vamp by Bibi's Collections
You can purchase this kit here

Font Of Choice 

Tube Of Choice -  Artwork By Di_Halim. You must obtain a license from S&Co to use this tube.

Program - Gimp 2.6..but any program will do.

--------------------------------------------

Open New Canvas
I did 650x650.you can resize it at the end if you would like.

Open Mask
Right click on your layers 
Go down to alpha by selection
Edit > fill w/ BG color - Make sure color is #FFFFFF

Add your paper of choice. I used paper9

-----------------------------------------------------------------

Ready...
Set...
Go...

Open BIBIROYALVAMP ELEM (127)
Now open BIBIROYALVAMP PAPERS (4) and use your rectangle tool and make a square on the paper
Copy and paste as new layer

The elements I used were:

BIBIROYALVAMP ELEM (104)
BIBIROYALVAMP ELEM (106)
BIBIROYALVAMP ELEM (120)
BIBIROYALVAMP ELEM (131)
BIBIROYALVAMP ELEM (3)
BIBIROYALVAMP ELEM (32)
BIBIROYALVAMP ELEM (4)
BIBIROYALVAMP ELEM (42)
BIBIROYALVAMP ELEM (64)
BIBIROYALVAMP ELEM (82)

Now dropshadow your elements with these settings.

Filters, Light And Shadows...DropShadow
Offset X - 9
Offset Y - 9
Blur Radius - 15
Opacity - 76
Color - #000000
Allow Resizing

Now resize your tag to 600x600 if you would like. 

When you are happy with your tag..
Add Copyright!!
Add Name!!
Merge All Layers!
Save!
Enjoy!!

Hope you enjoyed my tutorial. 


Ghouls Gathering @TTL


You can visit the forum here

Tuesday, October 14, 2014

PTU - Mummy Maat

This tutorial was written by me on October 14, 2014. Please do not claim as your own. Any resemblance to any other tutorial is purely coincidental.
------------------------------------------------
Mask Of Choice 

Scrap Kit - PTU scrap kit called Mummy Maat by Bibi's Collections
You can purchase this kit here

Font Of Choice 

Tube Of Choice -  Artwork By Di_Halim. You must obtain a license from S&Co to use this tube.

Program - Gimp 2.6..but any program will do.

--------------------------------------------

Open New Canvas
I did 650x650.you can resize it at the end if you would like.

Open Mask
Right click on your layers 
Go down to alpha by selection
Edit > fill w/ BG color - Make sure color is #FFFFFF

Add your paper of choice. I used Paper7!!!

-----------------------------------------------------------------

Ready...
Set...
Go...

The elements I used were:

BIBIMUMMYMAAT ELEM (12)
BIBIMUMMYMAAT ELEM (134)
BIBIMUMMYMAAT ELEM (23) (use the rotate tool and rotate -90)
BIBIMUMMYMAAT ELEM (30)
BIBIMUMMYMAAT ELEM (31)
BIBIMUMMYMAAT ELEM (36)
BIBIMUMMYMAAT ELEM (4)
BIBIMUMMYMAAT ELEM (43)
BIBIMUMMYMAAT ELEM (52)
BIBIMUMMYMAAT ELEM (58)
BIBIMUMMYMAAT ELEM (73)
BIBIMUMMYMAAT ELEM (76)
BIBIMUMMYMAAT ELEM (82)
BIBIMUMMYMAAT ELEM (86)
BIBIMUMMYMAAT ELEM (93)
BIBIMUMMYMAAT ELEM (97)

Now dropshadow your elements with these settings.

Filters, Light And Shadows...DropShadow
Offset X - 9
Offset Y - 9
Blur Radius - 15
Opacity - 80
Color - #000000
Allow Resizing

Now resize your tag to 600x600 if you would like. 

When you are happy with your tag..
Add Copyright!!
Add Name!!
Merge All Layers!
Save!
Enjoy!!

Hope you enjoyed my tutorial. 


Monday, October 13, 2014

PTU - Walking Dead

This tutorial was written by me on October 13, 2014. Please do not claim as your own. Any resemblance to any other tutorial is purely coincidental.
------------------------------------------------
Mask Of Choice 

Scrap Kit - PTU scrap kit called Dead Walking By Drea's Creations
You can purchase this kit here

Font Of Choice 

Tube Of Choice -  Artwork By Ted Hammond. You must obtain a license from CDO store to use this tube.


Program - Gimp 2.6..but any program will do.

--------------------------------------------

Open New Canvas
I did 650x650.you can resize it at the end if you would like.

Open Mask
Right click on your layers 
Go down to alpha by selection
Edit > fill w/ BG color - Make sure color is #FFFFFF

Open paper16
Copy/Paste to mask

-----------------------------------------------------------------

Ready...
Set...
Go...

The elements I used were:

DC_17
DC_22
DC_24
DC_25
DC_26
DC_30
DC_33
DC_34
DC_60
DC_7
DC_73
DC_8
DC_86

Now dropshadow your elements with these settings.

Filters, Light And Shadows...DropShadow
Offset X - 9
Offset Y - 9
Blur Radius - 15
Opacity - 80
Color - #000000
Allow Resizing

Now resize your tag to 600x600 if you would like. 

When you are happy with your tag..
Add Copyright!!
Add Name!!
Merge All Layers!
Save!
Enjoy!!

Hope you enjoyed my tutorial. 

PTU - The Haunting Hour

This tutorial was written by me on October 13, 2014. Please do not claim as your own. Any resemblance to any other tutorial is purely coincidental.
------------------------------------------------
Mask Of Choice 

Scrap Kit - PTU scrap kit called The Haunting Hour By Tasha's Playground
You can purchase this kit here

Font Of Choice 

Tube Of Choice -  Artwork By Elias Chatzoudis. You must obtain a license from his store to use this tube.

Program - Gimp 2.6..but any program will do.

--------------------------------------------

Open New Canvas
I did 650x650.you can resize it at the end if you would like.

Open Mask
Right click on your layers 
Go down to alpha by selection
Edit > fill w/ BG color - Make sure color is #FFFFFF

Open paper6
Copy/Paste to mask

-----------------------------------------------------------------

Ready...
Set...
Go...

The elements I used were:

TP_HH_e01
TP_HH_e02
TP_HH_e06
TP_HH_e08
TP_HH_e09
TP_HH_e11
TP_HH_e12
TP_HH_e36
TP_HH_e38
TP_HH_e39
TP_HH_e41
TP_HH_e51
TP_HH_e57
TP_HH_e62

Now dropshadow your elements with these settings.

Filters, Light And Shadows...DropShadow
Offset X - 9
Offset Y - 9
Blur Radius - 15
Opacity - 80
Color - #000000
Allow Resizing

Now resize your tag to 600x600 if you would like. 

When you are happy with your tag..
Add Copyright!!
Add Name!!
Merge All Layers!
Save!
Enjoy!!

Hope you enjoyed my tutorial. 


Friday, October 10, 2014

PTU - The Witch Is In

This tutorial was written by me on October 10, 2014. Please do not claim as your own. Any resemblance to any other tutorial is purely coincidental.
------------------------------------------------
Mask Of Choice 

Scrap Kit - PTU scrap kit called ABRACADABRA by Designz By Sue
You can purchase this kit here

Font Of Choice 

Tube Of Choice -  Artwork By Danny Lee. You must obtain a license from S&Co to use this tube.

Program - Gimp 2.6..but any program will do.

--------------------------------------------

Open New Canvas
I did 650x650.you can resize it at the end if you would like.

Open Mask
Right click on your layers 
Go down to alpha by selection
Edit > fill w/ BG color - Make sure color is #FFFFFF

Add your paper of choice

-----------------------------------------------------------------

Ready...
Set...
Go...

Open ABRACADABRA_004
Now open ABRACADABRA_PAPER 007 and use your ellipse tool and make a circle on the paper
Copy and paste as new layer

The elements I used were:

ABRACADABRA_010
ABRACADABRA_011
ABRACADABRA_015
ABRACADABRA_020
ABRACADABRA_039
ABRACADABRA_040
ABRACADABRA_058
ABRACADABRA_055
ABRACADABRA_060

Now dropshadow your elements with these settings.

Filters, Light And Shadows...DropShadow
Offset X - 9
Offset Y - 9
Blur Radius - 15
Opacity - 80
Color - #000000
Allow Resizing

Now resize your tag to 600x600 if you would like. 

When you are happy with your tag..
Add Copyright!!
Add Name!!
Merge All Layers!
Save!
Enjoy!!

Hope you enjoyed my tutorial. 


Thursday, October 9, 2014

PTU - BRUJITAS

This tutorial was written by me on October 9, 2014. Please do not claim as your own. Any resemblance to any other tutorial is purely coincidental.
------------------------------------------------
Mask Of Choice 

Scrap Kit - PTU scrap kit called BRUJITAS By Bibi's Collections
You can purchase this kit here

Font Of Choice 

Tube Of Choice -  Artwork By Di_halim. You must obtain a license from S&Co to use this tube.

Program - Gimp 2.6..but any program will do.

--------------------------------------------

Open New Canvas
I did 650x650.you can resize it at the end if you would like.

Open Mask
Right click on your layers 
Go down to alpha by selection
Edit > fill w/ BG color - Make sure color is #FFFFFF

Now open paper 1
Copy/Paste as new layer to your mask

-----------------------------------------------------------------

Ready...
Set...
Go...

The elements I used were:

BIBIBRUJITAS ELEMS (1)
BIBIBRUJITAS ELEMS (100)
BIBIBRUJITAS ELEMS (103)
BIBIBRUJITAS ELEMS (109)
BIBIBRUJITAS ELEMS (123)
BIBIBRUJITAS ELEMS (124)
BIBIBRUJITAS ELEMS (14)
BIBIBRUJITAS ELEMS (19)
BIBIBRUJITAS ELEMS (38)
BIBIBRUJITAS ELEMS (39)
BIBIBRUJITAS ELEMS (40)
BIBIBRUJITAS ELEMS (47)
BIBIBRUJITAS ELEMS (7)
BIBIBRUJITAS ELEMS (70)
BIBIBRUJITAS ELEMS (81)

Now dropshadow your elements with these settings.

Filters, Light And Shadows...DropShadow
Offset X - 9
Offset Y - 9
Blur Radius - 15
Opacity - 75
Color - #000000
Allow Resizing

Now resize your tag to 600x600 if you would like. 

When you are happy with your tag..
Add Copyright!!
Add Name!!
Merge All Layers!
Save!
Enjoy!!

Hope you enjoyed my tutorial. 


Sunday, October 5, 2014

PTU - Queen Dark

This tutorial was written by me on October 5, 2014. Please do not claim as your own. Any resemblance to any other tutorial is purely coincidental.
------------------------------------------------
Mask Of Choice 

Scrap Kit - PTU scrap kit called Queen Dark By Whisper In The Wind
You can purchase this kit here

Font Of Choice 

Tube Of Choice -  Artwork By Andy Cooper. You must obtain a license from S&Co to use this tube.

Program - Gimp 2.6..but any program will do.

--------------------------------------------

Open New Canvas
I did 650x650.you can resize it at the end if you would like.

Open Mask
Right click on your layers 
Go down to alpha by selection
Edit > fill w/ BG color - Make sure color is #FFFFFF

Now open paper5
and copy and paste as new layer on the same layer as the mask

-----------------------------------------------------------------

Ready...
Set...
Go...

The elements I used were:

QD El 21
QD El 30
QD El 32
QD El 37
QD El 52
QD El 53
QD El 71
QD El 73
QD El 9
QD El 93
QD El 97

Now dropshadow your elements with these settings.

Filters, Light And Shadows...DropShadow
Offset X - 9
Offset Y - 9
Blur Radius - 15
Opacity - 80
Color - #000000
Allow Resizing

Now resize your tag to 600x600 if you would like. 

When you are happy with your tag..
Add Copyright!!
Add Name!!
Merge All Layers!
Save!
Enjoy!!

Hope you enjoyed my tutorial. 

Friday, October 3, 2014

PTU - Hocus Pocus

This tutorial was written by me on October 3, 2014. Please do not claim as your own. Any resemblance to any other tutorial is purely coincidental.
------------------------------------------------
Mask Of Choice 

Scrap Kit - PTU scrap kit called Hocus Pocus By Drea's Creations
You can purchase this kit here

Font Of Choice 

Tube Of Choice -  Artwork By Toriya. You must obtain a license from S&Co to use this tube.

Program - Gimp 2.6..but any program will do.

--------------------------------------------

Open New Canvas
I did 650x650.you can resize it at the end if you would like.

Open Mask
Right click on your layers 
Go down to alpha by selection
Edit > fill w/ BG color - Make sure color is #FFFFFF

-----------------------------------------------------------------

Ready...
Set...
Go...

The elements I used were:

DC_109
DC_3
DC_36
DC_43
DC_48
DC_49
DC_50
DC_74
DC_78
DC_90
DC_112
DC_114
DC_116

Now dropshadow your elements with these settings.

Filters, Light And Shadows...DropShadow
Offset X - 9
Offset Y - 9
Blur Radius - 15
Opacity - 80
Color - #000000
Allow Resizing

Now resize your tag to 600x600 if you would like. 

When you are happy with your tag..
Add Copyright!!
Add Name!!
Merge All Layers!
Save!
Enjoy!!

Hope you enjoyed my tutorial.